Monday, December 21, 2009

Chocolate Chip Cookies, the classic holiday treat


The cookie, that tasty little morsel baked just for you to enjoy. For me cookies mean two things: Stacy’s favorite treat and holiday cookie parties.
Stacy is a master cookie baker. She makes a dozen chocolate chip or m&m chocolate chip cookies almost every weekend. (I try to sneak one off the baking sheet moments after they come out of the oven to devour while still warm.) Stacy makes the best chocolate chip cookies I have ever had, ever. They are the perfect crispy outside and gooey inside with just the right amount of chips. Her cookies bake to just the right thickness so that they are not too thin or crispy or too chewy. They are a confectionary masterpiece.

They key to baking any product well is controlling the temperature and melt rate of the fat in the product. Stacy starts her cookies by tossing a stick of butter into a mixing bowl that sits out in the kitchen to soften for at least two hours. Once soft, the butter is creamed which means it is worked with the back of a soup spoon in the mixing bowl until it is the consistency of mayonnaise. She then mixes the cookie dough adding the chips last. Finally, she forms the dough into balls about half the size of golf balls. Each ball is placed on a baking sheet as she forms them. As each cookie bakes, the butter melts as the other ingredients cook and the ball becomes a disk. Stacy usually makes a half batch of the Original Nestle Toll House Chocolate Chip Cookies recipe which can be found on the back of a bag of Nestle’s Semi-Sweet Morsels:


Yield: About 5 dozen cookies

2 1/4 cups all-purpose flour
1 tsp baking soda
1 tsp salt
1 cup (2 sticks) butter, softened
3/4 cup granulated sugar
3/4 cup packed brown sugar
1 tsp vanilla extract
2 large eggs
2 cup Nestle semi-sweet morsels (1 12-oz pkg)
1 cup chopped nuts (optional)
Pre-heat oven to 375
Combine flour, baking soda and salt in a small bowl. Beat butter, granulated sugar, brown sugar and vanilla in a large bowl until creamy (note: Stacy first creams the butter with the back of a soup spoon and then adds in the sugar and vanilla using the spoon to combine. At this point the mixture should be fluffy). Gradually beat in flour mixture (Stacy continues with her spoon). Stir in morsels and nuts (Stacy gently fold in the morsels again with the spoon). Drop by rounded tablespoon onto ungreased baking sheets.


Bake for 9 to 11 minutes or until golden brown. Cool on baking sheets for two minutes (this is when I snatch my warm treat); remove to wire racks to cool completely.


Friday, December 18, 2009

Pomelo Segment with Savory Meringue


The first pomelos of the season are arriving. You know, the dinosaur grapefruit. My favorite treatment of the giant fruit is to make an amuse bouche for a dinner party by segmenting the pomelo and dressing with a dollop of savory meringue and a petal from a pansy flower or a sprig of mint. The components can be prepped well in advance and stored in your fridge until you are ready to assemble the dish. I bought some spoons from Sur La Table specifically for amuse bouche service that I use for this dish. Stacy received a long pressed glass platter that is perfect for 12 servings. It looks spectacular and tastes good too.


Pomelo segments with savory meringue

Yield: 12 small servings

Ingredients
1 Pomelo
1 Pastuerized egg
Pansy petals or mint sprigs for garnish

Method
Segment pomelo, cut each segment in half or thirds, place on towels and chill.
Separate Pasteurized egg and reserve yolk for other purposes (like mayonnaise or ice cream)
Whip the egg white to froth
(Optional: Rub copper bowl with the inside of the pomelo rind to add some acid to the meringue before whipping)add a pinch of salt and pepper whip the white to firm peaks. Chill meringue until ready for use.

To serve, place two segment pieces on a large spoon or small plate refresh meringue and place a small dollop on segments garnish with a pansy petal or sprig of mint.

Egg Safety - Pasture-raised chickens from sustainable farms produce by far the safest eggs. However, there is always a remote chance of bacterial infection, so we Pasteurize the eggs for recipes that call for raw eggs.

How To Pasteurize Raw Eggs

Place the eggs in a pot with cold water. Put the water on medium heat while gently stirring watch as the temperature rises. You don't want the temperature of the water to exceed 150 degrees. To be exact, keep a thermometer probe in the water. When you reach this temperature, keep it. To do so, lower the heat, and watch so the temperature doesn't rise, then keep the eggs in the water for about 3-5 minutes.


Sunday, December 13, 2009

Meyer Lemon Sorbet in Lemon Cups


The citrus crop is coming on strong now at the Farmer’s Market. We now have our pick of tangerines, oranges, pomelos, grapefruit, and lemons. Stacy and I bought our first pomelo and fifteen more Meyer lemons during our outing to the market Saturday. The market traffic was light this week as folks were driven away by the heavy rains and cold winds. Despite the bad weather, we shopped for a luncheon I am cooking for Stacy and her group at work. In addition to the citrus, I bought fingerling potatoes, cauliflower, and placed an order for hanger steaks that will be ingredients in the six-course I plan to prepare and serve to the party of twelve this coming Wednesday.

I included a palette cleanser course between the cauliflower soufflé course and the grilled hanger steak with sea salt crusted roast fingerling potatoes entrée course. The palette cleanser is Meyer lemon sorbet in lemon cups. I made the sorbet from the fifteen Meyer lemons yesterday and it tastes incredible. The presentation of the sorbet will be in cups made from the shells of the lemons. There are several citrus dishes I serve that use the colorful shell as the cup which makes a charming statement on the plate. To remove any citrus from the shell, cut off the top 1/3 of the fruit and reserve the top to use as the “cap”. Then use a grapefruit spoon or small teaspoon to remove the pulp. This neat trick is accomplished by gently working the spoon between the pith and the pulp in a circular motion around the shell being very careful not to puncture the shell. Usually the pulp will release all except for the bloom end at the bottom. To finish the removal, gently hook the spoon under the pulp and pull from the shell. If some strings are left in the bottom of the shell, use a kitchen shear or paring knife to extract. Then cut a small flat spot on the bottom so the fruit will stand on a plate. Be careful not to open a hole in the bottom of the shell when making this cut. Now you have a shell cup and cap to use as the vessel to serve the dish you make from the pulp. Sometimes I will cut a design in the top lip of the cup for large fruits like oranges. The cup will also resist oven temps for a dessert prep that has cold filling in the cup and a piped meringue on top, sort of like a baked Alaska.

Here’s the recipe for the sorbet.

Lemon Sorbet in Lemon Cups For 8
12 lemons - You'll need one lemon per person plus a few to cut zest from. Make sure the bloom end (not the stem end) has a nice shaped "bump" and try to purchase uniform lemons.
Cut off the top 1/3 of the lemon (stem end) and reserve for the "cap." Hollow out each lemon by using a grapefruit spoon gently working just inside the rind and circling the flesh while being careful not to puncture the lemon. Remove juice and flesh and put it in your juicer. Make a slight shallow cut on the bottom of each lemon shells while being careful not to cut through to the inside of the lemon) This will allow them to sit upright on a plate without falling over.
Freeze the shells at least one hour or overnight. Then fill with sorbet for service. The frozen shell will help keep the sorbet frozen.

LEMON SORBET:

1/3 cup lemon zest cut from the extra lemons
1 cup strained fresh-squeezed lemon juice - from lemons used for cups and extra lemons
1 1/2 cups granulated sugar
1 Tablespoon vodka (keeps the sorbet from freezing solid)
1 1/2 cups water

In a medium saucepan over medium heat, combine sugar and water until sugar dissolves. Add lemon zest. Stir until mixture comes to a boil; boil 2 minute. Add the lemon juice and vodka, stir well. Remove from heat, cool completely and strain.

Ice Cream Maker - Transfer mixture to ice cream maker, process according to manufacturer's instructions.

Freezer Method - Pour into container, cover, and place mixture in the freezer. When it is semi-solid, mash it up with a fork and refreeze again. When frozen, place in a food processor or blender and process until smooth. Cover and refreeze until serving time.

Can be prepared 3 days in advance. Cover and keep frozen.

Makes 8 servings.

Meyer Lemon on Foodista

Saturday, December 5, 2009

Preserving Meyer Lemons


At this time of the year we see the beginnings of the citrus crop signaling that it will soon be winter with long, cold nights and rainy days. One of my favorite ingredients to make using citrus is preserved Meyer lemon rind. The Meyer lemon is a hybrid between a lemon and an orange that came from China. It was widely planted in California until it was understood to cause blight of other citrus crops. Nowadays there is the "improved" Meyer lemon that does not carry the blight. The fruits have delicate skins that will turn a blush of orange if left hanging on the tree long enough. When preserved, the rind is a savory, lightly sour and complex flavor balanced with salt that is used in the curing process. Any recipe that calls for acid and salt will benefit with preserved Meyer lemon rind as a substitute. One of my favorite is lemon-scented cauliflower. Simply mince some preserved Meyer lemon rind then mix with a bit of butter,salt and pepper, and brush onto washed florets. Roast the cauliflower for about 8 to 10 minutes until lightly golden brown. This is an excellent side dish. I also use the cooked cauliflower in savory soufflés.

To preserve Meyer lemons, use a 1/2 liter canning jar. I like the kind with the glass lid and rubber band for sealing. Always sterilize the jar and use a new sterilized band before proceeding. Thinly slice the lemons and toss in a bowl with kosher salt.


Pack into jar and top with lemon juice to within 1/4 inch from the rim. Add three bay leaves and five or six black pepper corns. Wipe the rim with a damp towel and seal the jar. Over the next two weeks, leave the jar on your kitchen counter. Shake the jar every morning and every night. The lemon rind undergoes a lactic fermentation much the same as a kosher dill pickle or sauerkraut. Place finished jar in refrigerator. Preserved Meyer lemons keep at least a year. They also make a nice holiday gift.

Wednesday, November 18, 2009

Mulligatawny Soup


I recently saw this soup on the Food network show Diners Drive-ins and Dives and decided I had to try it. It is delicious. A nice comfort food for the cooler months that is basically chicken curry in gravy over rice. The recipe has everything in one pot as a soup. I like rice, so I used 1 Cup rice cooked instead of 1 cup cooked rice which was a change I made after I photographed the ingredients.

The recipe was scaled to serve Stacy and me for a Tuesday after work dinner with enough left-over for a lunch for me. Since the rice and chicken are already cooked, it is a good use of left-overs (I guess that makes my lunch a left-over left-over?).

Every week I buy a whole broiler chicken, usually 2-1/2 lbs, that I break down into boneless breasts, boneless thighs and bone-in legs and wings leaving the carcass almost bare. I roast the carcass, giblets (without the liver), wings, legs and thighs while the breasts brine. Later that evening, the breasts become the center of a nice dinner for Stacy and me while the carcass and giblets go into the freezer until I have enough bones to boil in my 16-quart stockpot, which is about once a month.

My rice is steamed in my home-made chicken stock, which adds protein and imparts a deep, rich flavor to the long-grain white rice. In total this recipe used 6 cups of chicken stock.


Recipe adapted from the recipe contributed by Judy Miles, owner of The Little Depot Diner in Peabody, MA to DDD.

Ingredients
• 1 medium onion diced
• 3 carrots, diced
• 2 celery stalks, diced
• 1 medium leek minced
• 1/4 cup butter
• 1-1/2 tablespoons all-purpose flour
• 3 teaspoons curry powder
• 4 cups chicken stock
• 2 Sierra Beauty apples, peeled, cored and diced
• 1 cup white rice cooked in chicken stock (1 cup rice, 2 cups chicken stock, dash of salt, 21 minutes steam time)
• Legs and thighs from one chicken roasted 15 minutes, cooled and diced.
• 1/2 teaspoon salt
• 1/4 teaspoon herbs from Provenance
• 1/4 teaspoon freshly ground black pepper
• 1/2 cup cream, hot

Directions
In a large pot, over medium heat, melt the butter and add the onion, leek, carrots, and celery stalks. Cook until tender, but do not burn them. Stir in the flour and curry and cook for 3 minutes. Pour in 4 cups of chicken stock and let simmer for 30 minutes. Then add in the remaining ingredients, except the hot cream. Let simmer for 15 minutes and then add in 1 cup hot cream. Ladle into serving bowls and serve.

Stacy and I loved the soup snug in our warm house on a frigid, drizzly Tuesday evening. One idea I have to improve the soup is to puree the mirepoix after the 30 minute simmer then add the rest of the ingredients. I believe this will make the soup more like a bisque.

Sunday, November 1, 2009

Apple Oatmeal Crisp

Can you believe today is Nov 1? The beautiful beguiling weather the past week feels more like summer. Except Saturday morning. Stacy and I went to the market early Saturday morning groping our way up the Peninsula in the heavy fog that draped the roadways. The traffic was light on the highway and at the stalls around the market as it seemed the cool, damp weather kept folks tucked away somewhere warm. The Bay Bridge closure may have also discouraged people from making the trek to the market. Too bad because they missed the fall seasonal fruits and vegetables at their peak. Squashes, lovely Brussels sprouts, all sorts of root vegetables including turnips are available all around the market. The highlight for me, the apples right now are incredible. We stopped at the Apple Farm (Philo) stand to buy apples for an apple crisp that would punctuate our dinner with our friends Rich and Ann at our home Saturday night. We bought six Sierra Beauties, which are a wonderful cooking apple. Another really good apple is the pink lady which is available now through April from a farmer with a stand in the front of the Ferry building. The pink lady is a good snacking apple and really stands out in apple stuffing that I make to complement a crown pork roast that takes center stage at our family Christmas dinner. We also bought a dozen kumamoto oysters to go and two to eat there from George at Hog Island. The oysters are a creamy, briny treat this time of year. The dozen would be our appetizer at dinner with Rich and Ann.

We started the meal at 6:30 PM with oysters on the half shell from Hog Island accompanied by Hog Wash and cocktail sauce, Bellwether cresenza cheese and Acme baguette rounds which were complemented by two chardonnays, one from Lodi that Rich and Ann brought, and the Landmark Overloook that we served. We slurped the oysters and smeared the cheese on the bread rounds as Rich barbequed a 2.5 pound chateaubriand that he had marinated in cabernet and garlic for 24 hours. Meanwhile I boiled some purple potatoes from Zuckerman’s farm and steamed some dry-farmed haricot verts from Dirty Girl Produce in Santa Cruz. The meal was hearty and delicious.

Earlier in the afternoon Stacy and I did the prep to mis en place a tasty apple crisp using the sierra beauty apples. Stacy popped the desert in the oven when the meat went onto the grill so that it would be done and piping hot when we finished our entrée. It was served with a dollop of homemade vanilla ice cream that I froze after lunch. The apple crisp is a home dessert that was commonly served in the fall at family dinners. It’s easy to make.

Here’s the recipe:
Apple Oatmeal Crisp
6 firm apples (Sierra beauty or pink lady work well) cored, peeled, and cut into ¼ inch slices
Juice of 1 lemon
Zest of 1 lemon minced
¼ cup calvados (or a high quality brandy)
¾ cup light brown sugar
½ cup unsalted butter
¾ cup flour
½ cup regular rolled oats
1 tsp cinnamon
½ tsp ground ginger
¼ tsp ground nutmeg

Method:
Mix together apples, lemon juice, lemon zest, and brandy. Place in a buttered 9-inch round cake pan. Mix sugar, butter, flour, oats, cinnamon, ginger, and nutmeg until crumbly. Scatter evenly on top of apple mix. Bake at 350 degrees for 1 hour. Serve warm (it’s really good with vanilla ice cream).

Sunday, October 18, 2009

Crazy about pumpkin?

What a coincidence that the Food & Wine section of the Chronicle today was all about pumpkins in the middle of a few weeks of being crazy about pumpkins. I have always loved pumpkin pie. I mean LOVE pumpkin pie. To give an example, when I was in college I would reward myself with a slice from the cafeteria every time I aced an exam. I graduated summa cum laude. Was it the pie? Is pumpkin brain food?

We love our winter squashes, particularly the brilliant orange dumpling squash and the faithful butternut. We like to roast our squash and then make a soup or serve the flesh mashed as a side dish. It occurred to me last year that a pumpkin is just another variety of winter squash that I should be able to treat in much the same way in the kitchen and vice versa. As the pumpkins started making their appearance at the Farmer’s Market a couple of weeks ago I have been experimenting with them.

I started with the classic treatments for pumpkin by making a pumpkin bread and then a pumpkin pie, both started from a sugar pie pumpkin. My pumpkin pie was so good that I ate the entire pie in three days save a forkful that Stacy stole before I devoured the tasty treat. It was the best pumpkin pie I have ever eaten. It probably benefited some from being the first pumpkin pie this season, although I give credit to poaching a fresh sugar pie pumpkin and grinding fresh spices to making the pie light, fresh and sublime. I also made a pumpkin bread that I steamed like an English pudding. It was good, seriously good. Again, I started with a fresh sugar pie pumpkin and then used fresh, organic ingredients to make the best bread I could. Stacy took the finished bread to work which received accolades from her co-workers. Seriously good indeed. Here’s the recipe which can be made in a simple loaf pan, a fluted tube pan, or a traditional English pudding pan (a fluted tube pan with a lid to contain the steam).

Ingredients
3 cups sifted all-purpose flour
½ teaspoon baking powder
1 teaspoon baking soda
1 teaspoon fresh ground nutmeg
1 ½ teaspoons fresh ground cinnamon
½ teaspoon fresh ground cloves
½ teaspoon salt
3 cups sugar (granulated definitely works. I plan to try brown sugar in the next bread)
1 cup vegetable oil (I used canola for the pie last week. I plan to try ½ cup vegetable oil and ½ cup melted butter in the next bread)
3 eggs
2 cups fresh pumpkin puree (I poached a sugar pie pumpkin)
1 cup coarsely chopped walnuts
1 cup chopped raisins (I used some dried red flame raisins from a farmer on the plaza)

Method
Pre-heat oven to 350 degrees
In a bowl, sift together the flour, baking powder and soda, spices and salt
In a mixing bowl, combine sugar, oil and eggs whisk to blend well.
Stir pumpkin into the egg mixture.

Gradually add the dry ingredients about ½ cup at a time stirring after each addition. Fold in the raisins and walnuts. Prepare tube pan with butter and flour. Spoon batter into tube pan. Bake for about 1 hour and 15 or 20 minutes until a knife inserted in thickest part of bread comes out clean.
Remove from oven and cool on a rack for 10 minutes. Remove from pan. And cool completely on rack before slicing.
This loaf serves a large dinner party of 12 easily for dessert with seconds.

Market Report:
What else? Pumpkins are all over the market. Lots of stalls have sugar pie pumpkins and the Balakian Farm stall also has several heirloom varieties. I plan to try one of the Musquee de Provenance which is also known as the Fairy Tale pumpkin. If you like eggplant there are many varieties available now from several stalls at the market. I plan to use some as a stuffing for poultry using the recipe in the Café Beaujolais cookbook. We arrived at 9:30 AM and already Marin Sun Farms had sold out of their eggs from pasture-raised chicken. Bummer. The best news for us was that Mountain Home Ranch had chickens that weighed about 2 pounds each. We found the small birds to be delectable last spring before the farmer starting growing the birds too large (over 6 pounds each). He is being rewarded with bringing smaller fowl as some upscale restaurants around the City have discovered him. I hope that keeps him motivated to continue to harvest his flocks while the birds are young and tender.

There are still some tomatoes available, which are pretty much all early girl variety. Still sweet and firm, they make an excellent caprese with the fresh mozzarella from Cow Girl Creamery and some basil from the garden. It is the last gasp of summer as we get into the cooler and blustery fall season.

Stacy and I rounded out our trip to the market with a stop at Sur La Table to buy four Emille Henry 2-cup terrines. The vessels are perfect for my chicken pot pie with a butter crust. Stacy liked the one I made for her on Tuesday of last week so much that she wanted to serve the dish as the entrée for dinner with our weekend guests and good friends Jim and Kristin. The ceramic terrines were perfect for the dish as the shape distributed the heat evenly to the filling and the smaller opening in the top allowed me to make four perfect caps from one 9-inch butter pie crust. Our meal was simple and comforting. Kristin brought a shrimp-stuffed jalapeno wrapped in bacon as our spicy appetizer that we enjoyed on our deck with a flute of champagne. We then went into our dining room to dig into the piping hot chicken pot pies. The yellow terrine was beautifully presented with a golden brown crust on a multi-colored Kate Spade dinner plate that had yellow accenting a red and black rim and white center. It was a simple meal with gourmet flavors. We drank some wonderful wines grown and made by a mutual friend on their vineyard in El Dorado. We finished the meal with Kristin’s homemade carrot cake cupcakes. It was divine.

We are all booked up for the Thanksgiving Prelude meetup coming up November 7. It promises to be a fun day with some interesting and enthusiastic cooks.

Friday, October 16, 2009

Peas and Carrots yin yang soup


Carrots are ubiquitous in my cooking usually as one of the trilogy of mire pois aromatics that create the canvas of flavors in stocks, soups, salads, braises, and on and on. I am a big fan of soups especially vegetable or fruit soups. This dish is a combination of two delicious soups that complement one another in flavor, texture and color. When served together in a single bowl the presentation is spectacular.
Be careful to prepare the soups with the same hearty textures so that they flow together to form the yin yang design without being too runny.

Prepare carrot soup and pea soup separately

1/2 cup crème fraiche

To Serve:
Simultaneously pour both soups from opposite sides of serving glass and offset to form a Yin-Yang design. Slide the bowl back and forth to bring the soups to the same level.

Place a dollop of crème fraiche in individual sauce boat and serve alongside or drizzle on top.


Carrot Soup

1 tablespoon olive oil
2 pounds carrots, peeled, sliced
1 large onion, finely chopped
3 garlic cloves, brunoise
2 whole cloves
4 cups (about) chicken stock (vegetable stock may also be used)
1 1/2 teaspoons fresh lemon juice
dash of nutmeg

Heat oil in heavy large saucepan over medium heat. Add carrots, onion, garlic, and cloves and sauté until onion is translucent, about 8 minutes. Add 3 cups broth. Cover and simmer until carrots are very soft, stirring occasionally, about 30 minutes.

Remove cloves from broth and discard. Puree soup in batches in blender. Return soup to same saucepan. Mix in lemon juice and nutmeg. Season to taste with salt and pepper. Thin to desired consistency with more broth. (Can be prepared 1 day ahead. Cover and refrigerate.)

May be served cold or reheated.

Green Pea Soup with Tarragon

2 lb fresh shucked peas (weight after shucking)
1 tablespoons extra-virgin olive oil
1 cup sliced shallots
4 cups (or more) chicken stock or vegetable stock
2 teaspoons chopped fresh tarragon, divided

Heat oil in heavy large saucepan over medium-high heat. Add shallots and sauté until golden and almost tender, about 7 minutes. Add peas, 3 cups broth, and 1 teaspoon tarragon; bring to boil. Reduce heat to medium and boil until flavors blend and peas are tender, about 7 minutes. Cool slightly. Working in batches, puree remaining soup in blender until completely smooth. Return soup to same saucepan. Bring to simmer and thin with more broth by 1/4 cupfuls, if desired. Stir in remaining tarragon. Season with pepper.

Monday, October 12, 2009

Scratch pumpkin pie

The Ferry Plaza was packed on Saturday when Stacy and went to do our weekly shopping and to meet our friend Crosby for lunch. Crosby had invited us to watch the air show from the roof of his building on Telegraph hill so we invited him to join us for lunch to make a full day together. I enjoy how the changing of the seasons affects our diet as we try to eat seasonally from the farmer’s market as much as possible. As we are moving into the cooler and wetter months, we are craving comfort foods and our taste for white wine wanes as our enjoyment of full bodied red wines increases.

This week I am experimenting with making pumpkin pie and pumpkin bread starting from fresh sugar pie pumpkins instead of opening a can. Several vendors at the market offer the small orange gourds for sale. I bought one last week that I cleaned, quartered and roasted. This week I bought another pumpkin to try poaching to see if it works better. The roasting method caused a tough skin to form on the inside of the pumpkin. I am sure poaching the pumpkin will prevent that from happening, although I am concerned about having too much moisture content in finished product.

Why go to all that trouble when canned pumpkin is so widely available and so inexpensive? For me there are three reasons:

1) Taste: Starting from fresh produce always produces a fresher tasting final dish. It also lets me control all of the seasonings that get added to the produce.

2) Source: When I start from fresh produce that I buy directly from the grower I know where the plant that bore the fruit grew and how it was tended by the farmer. I get to know the farmers that I buy from so that I know that we are eating produce that is grown using protocols that do not include chemicals or manipulation of the produce (like hot housing).

3) Satisfaction: Making a dish all the way from fresh produce to finished product is a satisfying and fulfilling journey. The simpler the better for me too.

Here’s the recipe for pumpkin pie:

2 cups pumpkin puree:
To make the puree, get a sugar pie pumpkin and cut off the top. Cut the pumpkin in half from stem to bloom. Scrape out the seeds and the stringy innards. Clean and toast the seeds for a nice snack. I like mine with sea salt and a bit of pepper.

Pre-heat oven to 400 degrees. Place the pumpkin halves skin side up in a baking dish with 2 inches of water (This is the poaching method). Bake for about 45 minutes until the pumpkin flesh is soft. If the water gets nearly all evaporated, add boiling water to keep the poaching process going. Cool, remove the skin and puree the flesh of the pumpkin.

¼ teaspoon salt
¾ cup granulated sugar
1 teaspoon ground cinnamon
½ teaspoon ground ginger
¼ teaspoon nutmeg
¼ teaspoon ground cloves
2 eggs
12 oz unsweetened evaporated milk

Mix the ingredients together well.

Preheat oven to 425 degrees

Pour mix into a 9 inch baked pie shell (blind bake a nice flour and butter crust). Protect the exposed crust edges with aluminum foil so they don’t burn.

Bake the pie for 15 minutes then reduce the oven temperature to 375 degrees and bake for another 30 to 45 minutes until a knife inserted in the center of the pie comes out clean. You may remove the crust protection in the last 10 minutes of baking to crisp up the crust edges.

I like my pumpkin pie with a dollop of whipped cream (not the stuff from a can!). I sometimes whip my cream flavored with a bit of almond liqueur.

This pie is always a hit at Thanksgiving. We will make the pie at the November 7th meetup. There are still four spots available.

Wednesday, September 16, 2009

Cooking on Howell Mountain


In June of every year there is an auction event held somewhere in Napa to benefit the Howell Mountain Elementary School, a charming school that serves the community in and around Angwin atop Howell Mountain. Our good friends Jacalyn and Allen Spence have a vineyard and winery they have been building nearby for over a decade now. It is one of our favorite places to visit with the only kitchen I like to cook in other than my own. Jacalyn volunteers for the auction in some major leadership role every year. We make sure to attend the auction to support Jacalyn and Allen and to share their company afterward overnight at their home. It is absolutely bucolic.

Well, usually it is. This weekend Stacy and I along with a few of our friends cooked, served, and cleaned up after a five course meal for 60 folks that was auctioned in June for $100 a seat. Saturday was a very long and busy day that started at 3 AM when our frightened dog awakened us to let us know there was a thunderstorm directly over our house as all 95 pounds of quivering mutt-head tried desperately to get under Stacy’s pillow to become invisible. Sleep deprived and groggy, we rose early to start the day. After walking our dogs, starting 8 pounds of beans to soak, and loading my truck and borrowed trailer full of food and service equipment, we headed north just after 9 AM to pick up our friends Buda and Deb at their home on Portero Hill. The four of us made a hectic twenty minute stop at the Ferry Plaza Farmer’s Market to pick up three flats of stone fruit, 20 sweet baguettes, and a few other items to complete the shopping for the feast. After driving another hour and a half, we were atop Howell Mountain by noon to drop off the trailer at Summit Lake Winery so the team there would set up the dining table and the plating station. At about 1 PM we started cooking at the Spence Winery at the other end of Summit Lake Drive.

All afternoon six of us chopped, sliced, emulsified, and tasted enough salad, heirloom tomatoes, vinaigrettes, cucumbers, and humus to finish the prep. We sizzled a full 750ml of garlic oil that made the whole house smell like a Texas toast factory. All went smoothly in the Spence kitchen with only a few hiccups like ransacking my coolers for the Dijon mustard and not finding it until after we had scrounged some from Jacalyn’s fridge. This made getting the taste profile of the vinaigrettes a challenge as the mustard we scrounged had a much higher salt content than what I written the recipe for, which is why the recipe says “salt to taste”. After removing some of the mix and adding more vinegar, the base balanced and we added the oil to emulsify a delicious balsamic vinaigrette for the bruschetta.

By 4 PM we had reloaded my truck and headed for Summit Lake Winery. As we pulled into the long gravel drive between the blocks of vines towards the house, we saw what the team had accomplished while we were cooking. The table was beautifully set with white table cloths and chair covers, gold chargers, gold flatware, and alternating red, gold, and black napkins and chair bows. The look of it took my breath away, and the length of it reminded me that we had a lot of work ahead of us.

The house at Summit Lake is essentially a cabin with drop-dead gorgeous views of the Valley, but a small 1940’s kitchen. We set up our stations on tables and a hutch to finish our dishes. The final prep involved blending the avocados and lime juice into two gallons of avocado corn soup and staging the containers of it in a large cooler while the beans simmered in my 16 quart pot on a portable stove on the patio adjacent to the kitchen. We also had to make the cilantro oil which turned out to be the biggest challenge of the afternoon. In the confusion of moving from one location to another to prepare the meal, the Italian parsley brought to garnish the entrée was chopped with the cilantro and blended with extra virgin olive oil for the cilantro oil. This mistake caused the blender to be overloaded and the straining process was completely clogged as the parsley absorbed the oil. After struggling with the green glob for 45 minutes, Buda was able to extract enough of the herb oil for the soup course. We would find out later though that we would have a crisis looking for a garnish to add color to the entrée dish.

At 5 PM our first guest arrived a full hour early. Heather welcomed him, gave him a glass of wine and took him away from the kitchen to the lawn to enjoy the view and the beverage. By 5:45 several guests had gathered in the orchard in front of the winery building, so we decided to send out appetizers 15 minutes ahead of the “official” start time of the party. Humus was piped onto cucumber rounds along with a dollop of Greek yogurt and toasted sesame seeds as the first appetizer. Mark, proprietor of Summit Lake, sliced gorgeous figs in half and then opened each one into a v-shape. He then nestled a small piece of chevre into the slit followed by a drizzle of peppered honey over the cheese as the second appetizer. Meanwhile Stacy and Jacalyn sliced four gallons of rounds from the fresh baguettes. They then went to Allen who brushed one side of each round with the garlic oil and toasted them in my toaster oven as the base for the third appetizer: heirloom tomato brushetta. Buda and I topped the toasted rounds with the tomatoes we had chopped earlier in the day which had been marinating in a balsamic vinaigrette for a few hours. With a bit of basil chiffonade to garnish the dish, we sent them out to the hungry guests. More and more guests arrived over the next half hour as my team continued to crank out appetizers to feed them. We were operating like a well oiled machine.

At 6:30 PM I went out to the appetizer station to let Heather (the other half of the Summit Lake team), know that the kitchen was standing by ready to start meal service at the table. Around 6:45, we transported the soup course to the plating station near the dining table about 150 yards from the kitchen. We executed the plating process by spreading bowls onto a table followed by two of us ladling soup into each bowl; two more drizzling crème fraiche onto the pale green soup; followed by another adding avocado balls; finished by another team member drizzling cilantro oil to finish each bowl. Once plated, the bowls were loaded onto trays for service and sent to the table. This was repeated over and over again until the entire table was served. Serving four courses on that long table was looking like hard work!

After all of the soups were on the table, we met the biggest challenge of the day: The team had to be split in two. I would travel back to the Spence’s kitchen with Jacalyn as my helper to finish the entrée and make the cabernet sauce while Buda led the rest of the team to bus soup bowls and send out the stone fruit salad. Jacalyn and I left on a dead run to my truck to make the trip to her house as Buda took command of the service team. As the old beast roared to life, the clock on the dash read 7:08 PM. This created yet another concern as the sun would set at 7:20, leaving us in the dark to finish service. Four minutes later we were at the Spence’s. We quickly removed the one-time-use aluminum braising pans from the oven one by one, each one containing over 16 pounds of short ribs. Each pan made a trip to the sink where I let it protrude a bit over the sink from the counter with a container ready in the sink to catch the braising liquid. I then punctured the end of the braising pan with my knife to let the liquid run out of the pan. The drained pan, with the ribs still inside and covered, were then placed into an identical braiser to keep any remaining juice in the pan. This technique enabled us to drain the braising liquid from 48 pounds of ribs without uncovering the pans. The liquid was then strained into a large pan on the stove to make the cabernet gravy. We repeated this procedure three times with one mishap when one pan leaked a trail to the sink. With her dog lapping ahead of us, Jacalyn and I made a quick cleaning of the floor as the sauce heated on the stovetop. The liquid was thickened into a beautiful red gravy using a roux I had made from the tallow I skimmed from the initial braise of the meat. This saved time and made a rich, flavorful gravy.

Once we had the gravy into containers we loaded them into my truck with the braising pans and covered both with a blanket to keep them hot. It was 7:20 PM as we headed back to Summit Lake with twilight falling. Other than a moonless darkness quickly falling around us the timing worked well as the last of the salad plates were being bused as we starting plating short ribs with cabernet sauce and cannellini runner beans with Italian parsley. Where is the parsley? Buda and I dashed back to the kitchen to find the missing herb that would garnish the pale white beans. It was then that I realized we had blended all of the parsley along with the cilantro earlier during the last prep. Oops. Undaunted, we quickly made a chiffonade of the basil left-over from the bruschetta, and flew back to the plating station. By this time it was full darkness with very little lighting provided by some decorative lights strung in a nearby tree. I had to remove the ribs by feel from the scalding braise. Somehow we managed to plate for all of our guests followed by plates for our hungry staff that had been hard at work since early morning with very little to eat other than samples of what we prepared for our guests. We were famished and satisfied that we had fed so many people an elegant and scrumptious meal.

We all grabbed a plate and settled into some empty seats along the table that were left unused by eight no-shows. They really missed out on some good ribs. The sauce had started as 12 pounds of beef knuckles a week earlier. I had roasted the bones with the little bit of meat they had on them which all went into a stock that was slow simmered for over 12 hours. The finished stock contained so much gelatin that it set up like Jell-O. This was added to the braise along with heirloom tomatoes that had been canned in our August 2nd meetup , and a beautiful Napa Cabernet Sauvignon that the Spence’s had made. The ribs were braised last Thursday for two and a half hours at 320 degrees. Once cooked, the braising liquid was de-fatted and added to the one-use aluminum braising pans along with 20 ribs in each pan. The tallow was slow cooked with all-purpose flour the same day to make a blond roux which was then stored in my refrigerator. The pans were then sealed and refrigerated until Saturday at 2:30 PM when we put them into 250 degree ovens to reheat for dinner. The long cooking process married the flavors of the allspice and wine and tomatoes to succulent perfection. The velvety gravy executed a perfect pairing between the dish and the Howell Mountain Cabernet that was served with dinner. The beans added that contrast that created a magical combination of flavors and textures and with the basil chiffonade, color too.

Once done with the entrée, it was back to work to clear the dinner plates and serve our dessert. Heather had made four Mexican chocolate tortes that were like cinnamon chocolate ganoush. These were plated alongside a scoop of vanilla ice cream. Both received a generous spoonful of raspberry sauce that I had made a few weeks before, froze, and thawed that day. Although plating in the dark meant some drips on the plates, it was decadently delicious.

Now all that was left was to clean up. At 9:30 PM we wearily made our way back to the Spence’s for some beautiful 2006 Cabernet from their winery. We sat up until about 11 PM chatting about the dinner party, laughing at our mistakes, loving the wine, and just having fun together. The last things I remember from the night were my head hitting the pillow, blinking once and seeing morning.

Time to get up and enjoy the Wine Country!

Sunday, September 6, 2009

Grilled corn and mushrooms

Last week I promised to recreate the corn and mushroom dish we fell in love with at Slanted Door. It is actually quite simple to do, as many dishes are that let the fresh ingredients express themselves. Here’s the recipe:

Slanted Door Grilled Sweet Corn
Serves 4 as a side dish

Grill 2 ears of fresh sweet corn. Cool and strip the kernels from the cobs.
Chop a dozen small chanterelle or shitake mushrooms into medium dice (each dice about four times the size of a kernel of corn)
Heat 1 tablespoon peanut oil to smoking in a wok.
Keep the heat below the wok on high and work quickly.
Add mushrooms and sweat until they release their moisture
Add corn kernels and 1 teaspoon fish sauce.
Once corn is heated, serve and enjoy.

Last week, Stacy and I had one of those rare Friday vacation days to enjoy together, just the two of us. After luxuriously sleeping in until 7:30 AM, we rose, fed our dogs and walked them a couple of miles to get our blood flowing again. One back home and showered, we enjoyed a light breakfast of Bellwether Farms sheep’s milk yogurt with fresh berries followed by a hot shower. What a wonderful way to get our goof-off day started.

Well, not quite a goof-off day. We did have a mission to accomplish as part of our preparation for the Sept 12 benefit dinner party on Howell Mountain: I needed to measure the oven at Spence Vineyards to make sure 48 pounds of braised short ribs would fit in it, which is the one hot dish we plan to serve next Saturday. A trip to Howell Mountain gave us the opportunity to make a day trip to the Wine Country, which is one of our favorite things to do to relax and enjoy each other’s company. I also had several phone calls to make to stay on top of my consulting business, which I planned to do from the car during the hour and a half drive from our home in Burlingame to Angwin on top of Howell Mountain.

Then there was the Bay Bridge closure to contend with. We chose to route across the San Mateo Bridge to get to 880 and travel North to Vallejo on 80 and over on 37 to 29 for the drive up the Napa Valley. Traffic was stop and go on the East side of the San Mateo Bridge as we crawled towards 880. It took a half hour longer than expected to get to Napa which meant I had to lead my conference call from the passenger seat of the truck as Stacy sped North. As we neared Saint Helena, the traffic slowed to a craw again prompting Stacy to leave the line of cars to taste some wine at Hall Winery. I was able to wrap up my call as she eased the truck into a shaded parking space much to Stacy’s delight.

Scott, our pourer at Hall was very friendly and eager to share all of the sustainably farmed wines including some delicious single vineyard bottling of three different varietals. We really like the two sauvignon blancs that comprise all of the white wine program for Hall. Their T-Bar-T at $22 was a rich and complex blend of SB and vigonier and a touch of new French oak that we highly recommend. We also loved the Diamond Mountain Cab which is only available at the winery. It was luscious with a good balance of dark berry fruit and oak and a long finish. Yum. It is $100 per bottle though, which makes it a special occasion wine and more than we wanted to pay. It was nice to have a taste, though.

After our tasting, we back tracked a few hundred yards to buy three of specialty sandwiches from the deli in the back of Dean and Deluca. Stacy also bought a bag of chips and a German chocolate cupcake to share. Then we got back into traffic to make the final slog into Saint Helena to pick up a case of olive oil from Olivier Napa Valley. They recycle bottles and the customer fills their own bottle from the large copper vats of oils that include small tasting cups and crunchy bread for tasting the oils. It is nice to taste and compare the different oils to find what you like the most before buying. We bought six Mission and six Arbequina that I will use for cooking, making vinaigrette, mayo and aioli.

After loading the case of oil into our truck we headed up Howell Mountain to Spence Vineyards where we enjoyed a leisurely lunch with Allen Spence on his porch overlooking his vineyards and expansive herb garden. It was such a beautiful day to munch delectable sandwiches in an Eden-like setting even with the swarm of hornets that wanted part of our lunch, or a nibble of our skin for their lunch. I felt reconnected to nature in a very real way, and content too.

The oven checked out so I believe there will be enough room for braising all 48 pounds of short ribs next Saturday if I combine the space of their Viking oven in the kitchen with the gas grill on their porch. It will be challenging to control the heat of the grill and to pack the braisers so that the meat fits and still develops the flavor profile I’m looking for to delight 60 diners at dinner next week, but I think we can manage.. Wish me luck, please!

After lunch, Stacy and I were back on the road, although this time we were on back roads between Calistoga and Occidental. The drive over the mountains was glorious as we sought to accomplish our second mission: picking up two cases of Baletto Pinot Gris that will be served with the dinner next Saturday. It’s a crisp refreshing wine that sells for $9.80 a bottle if you buy a case. When a wine is both affordable and good we like to buy quantity to share. A quick stop at Baletto and then we went around the corner to Lynmar to relax in their garden overlooking the Quail Hill Vineyard while enjoying their reserve tasting of two chardonnays and two pinots. They served the 2006 La Sereinité and 2007 Old Wente selection chardonnays. The La Sereinité was superb and priced accordingly. The Wente was okay and while priced much less than the LS, it wasn’t something we would buy as it seemed to heavily oaked. The pinots were the 2006 Russian River and 2007 Terra de Promissio Vineyard. Both were quite good and priced fairly (if you get the member discount that is). Stacy and I lingered at Lynmar to enjoy the smells of their organic vegetable and herb garden and to stroll the grounds to enjoy the late afternoon mild weather. It was blissful.

We headed south on 101 from Santa Rosa just before 4 PM. As we got to Petaluma a half hour later we saw miles of cars stacked up to get onto roads that connected North Bound 101 to points east. I mean miles and miles of cars that didn’t seem to be moving at all. Then just north of Sausalito, Southbound 101 came to a grinding halt. It took us ½ hour to go 2 miles to the Spencer Avenue exit to make our way down the cliffs into the downtown district of Sausalito. We decided to take refuge in our favorite sushi restaurant for an hour or so to let rush-hour traffic dissipate.

Sushi Ran is one block of the main drag just across from the marina in Sausalito. It is housed in the ground floors of two buildings separated by a breezeway in a small office complex. One building is the sushi bar and restaurant which is always crowded with narrow passages between tables making it difficult for the patrons and wait staff no navigate without occasionally jostling a seated diner. We prefer the bar across the breezeway with expansive spaces to relax both at the bar and at cocktail tables inside and on the patio. They serve a full dinner menu to patrons there along with wines, a vast selection of sakes, and beer and well drinks. We sat and enjoyed fresh hamachi nigiri, roasted kumamoto oysters, spicy tuna rolls, and scallop dumplings along with a chilled, floral sake called Akitabare that was poured to overflowing into a clear glass set inside a lacquered wooden box. Everything was great although the spicy tuna rolls were something we would not order again.

The bar at Sushi Ran is a typical sushi bar atmosphere where patrons will strike up friendly conversations with strangers seated next to them. We met a fellow foodie couple also taking refuge at the bar before the showing of Julia & Julie at the nearby theater. They live in Tiburon and make their own wines at their weekend place in Sonoma. They are very fortunate to get access to fruit that is contracted for Napa Silver Oak Cabernet. Apparently during harvest some clusters fall off the tractor onto his crush pad where he just lets the fruit speak for itself. We hope to be invited to dinner there soon!

Happy Labor Day Weekend!

Sunday, August 30, 2009

Gourmet Corn on the Cob?

How many of us remember going to a picnic where there was a pot of boiled corn on the cob? I always remember thinking what a perfect food – it tastes great, looks great, and comes on its own serving utensil. I always liked mine rolled in butter with a bit of salt. Give me a burger with ketchup and onions then I’m in heaven.

As an adult I still love corn on the cob, especially if it is picked no more than the the day before I eat it. This is a great year for sweet corn. There is a stall at the Ferry Building Farmer’s Market that has pretty good white corn. The best I have had, ever, is the heirloom yellow and white that a farmer offers at the Burlingame Farmer’s Market on Sunday. The corn is grown in Gilroy where the hot weather is perfect for growing grain like corn. The farmer has consistently had white corn that is super sweet and crisp. Occasionally they have the heirloom variety which is also crisp and sweet with a more complex almost nutty flavor that comes through when I grill it.

There are a few basic ways I cook fresh corn depending on if I want to fire up my grill or not. Friday and Saturday were sweltering hot in Burlingame, so I took the kitchen outside to my simple Weber kettle grill. About 30 minutes before grilling the corn, I start the coals in my chimney to get the grill going, and I put the ears in my sink in cold water to soak. Be sure to leave the husks on for outdoor grilling. When ready, I pour the glowing coals onto one side of the grill so that I have two distinct cooking areas: One over direct heat which has the coals below, and the other side for indirect heat that does not have any coals below. I always set up my grill this way no matter what I plan to cook. For meats, I sear over the coals with the lid off to get perfect grill marks, and finish indirect with the lid on to get the perfect temperature and a good infusion of smoke. Before the meat or vegetables go on, I place the corn at the edge of the direct heat area to get the steam going inside the husks. I rotate the corn a quarter turn every three or four minutes as the husks get a toasted look to them. Once the whole corn is tan, I remove from the grill and wrap in foil while I cook the meat, which takes five to seven minutes depending on what I am grilling (usually boneless chicken breasts, hamburgers, or steaks). While the meat is resting I shuck the corn. If all I want is some butter and salt, I shuck an ear, roll in butter, have Stacy sprinkle a bit of salt while I rotate the ear, and put it back into the foil to keep it hot. I repeat this process one ear at a time. If I want some grill marks on the corn, I take the shucked ears to my grill for a quick sear over direct heat and then move them to the indirect side to keep hot. I then repeat the butter and salt process and rewrap the ears to keep them hot until opened at the table. Delicious!

This weekend Stacy and I enjoyed one of those rare weekends that our plans were simply “do nothing”. We savor the opportunity to be completely spontaneous for two days particularly over a hot and lazy late summer weekend. We made our usual trip to the Market with our only task to buy a few items for our meals over the coming week. After picking up eggs, plums, peaches, strawberries, runner beans, red onions, a few varieties of heirloom tomatoes, English peas, Brussels sprouts (the first of the season), and some carrots, we decided to have lunch seated at the bar at Slanted Door. If you arrive a few minutes before eleven you are guaranteed a seat at the bar, and lately even a table if you want. We like to sit at the bar to chat with the bartender as we enjoy a sort of Asian tapas meal. Stacy loves the Reposado (rested and aged in wood) margarita up with no salt which is served in a chilled martini glass. I always ask the bartender for a white wine recommendation since their wine list is incomprehensible to me as I rarely drink the floral sweet wines from Eastern Europe that they feature. I usually get a dry Riesling reminiscent of Chablis that pairs well with the flavors Chef Phan imparts into his dishes.

The food is always fresh and a mix of seasonal and regional ingredients that Phan uses to achieve his fusion of East and West. The menu includes a vegetables section at the bottom that features something sourced from a local farm as an ingredient in a vegetable side dish. We frequently order a vegetable dish accompanied by broken white rice as our entrée, as we did this Saturday. The dish was white corn from Catalan Family Farm that was grilled and stripped from the ears. The chef then fired some chanterelles in a hot oiled wok with some scallions, fish sauce, a hint of chili, and the corn kernels.

I plan to duplicate the recipe tonight using my Lodge cast iron wok and the heirloom corn I bought today at the Burlingame Market. I’ll let you know how it turns out.
Perfect Corn On The Cob on Foodista

Wednesday, August 26, 2009

Chicken Salad


Chicken salad sandwiches were something I grew up eating. Recently I reconnected with this simple dish and found I really like it when it is made from scratch with fresh ingredients. It is also a healthy and inexpensive meal. I buy whole chickens and then de-bone them myself because I know where the meat comes from and how fresh it is. Also, I buy a whole natural chicken for what it costs to buy just the breasts from the meat counter.

On September 19th I plan to lead a class at my house to teach the knife skills necessary to accomplish this simple task and create a few dishes from a single, whole chicken. From one chicken Stacy and I get a nice meal of roasted or grilled "airline" breasts. I also make stock from the carcass which I use for soups or to make risotto or steam rice or let soak into pasta. I use stock as a base for pan gravy sometimes when I want a bit more comfort in our meal when we eat the breasts. The other parts: the legs, thighs and wings are used for quick meals.

When I de-bone the chicken, I de-bone the thighs and leave the bones in the legs and wings as I don't find the resulting boneless cuts worth the effort. I roll the boneless thighs and set next to the legs and wings and roast them with the carcass as part of the de-boning process. The roasted carcasses and pan drippings go into the freezer in a bag until I have enough bones to make it worthwhile to spend a few hours making stock. The legs and thighs go into the refrigerator and the breasts to a brine for dinner that same day. It takes me about 5 to 10 minutes to complete the deboning and another 15 minutes to roast and de-glaze the roasting pan.

Later in the week I slice the boneless thighs and strip the meat from the legs to use in salads. The wings are used for spicy wings or just eaten cold for lunch one day. My favorite salad is my aioli based chicken salad. I love it on toasted bread for lunch. Sometimes Stacy and I will eat it for dinner. I usually produce four portions from the legs and thighs of one chicken, so it is a very inexpensive food. It is labor intensive to make a fresh salad if you cut the vegetables to get the best texture and flavor from the salad..

I start by making my own aioli which is described in an earlier post. This is not hard with a power mixer and tastes so much better than store-bought mayo. For my salad I use one egg yolk and 1/2 cup of oil in the aioli. Then I cut fresh carrots into a brunoise; fresh onion and celery into a small dice; And then I add pickles. I love pickles. I make my own dill using all sorts of vegetables like zucchini squash, radishes and even turnips. I make bread and butter pickles with onions and cucumbers and sweet red or yellow peppers. For my salad, I drain the pickles and then chop them into dice the same sizes as my fresh vegetables. Next, I add a bit of mustard and paprika. Sometimes I throw in some drained capers if I have them in the fridge. I mix the chicken meat and everything else in the aioli, adjust the seasonings and it's ready to eat.


I did the math to calculate what all of the meals cost when I start from whole chickens. A whole natural Fulton Valley Farms chicken costs about $3 per pound. I recommend that you buy natural over organic free range as the chickens live a better life. The best are pasture-raised if you can find and afford them. They cost $5 or $6 per pound. With a natural chicken the whole 3 lb bird costs about $10. Add a pasture raised egg for the aioli which costs 60 cents each. I make egg white omelets from the whites since the aioli only uses the yolk. I estimate that the oil, vegetables, pickles, mustard and spices adds about $4 (I use 50% extra-virgin olive oil and 50% salad oil in my aioli for chicken salad). So for $15 I get two entrees, an egg white omelet and the filling for four sandwiches. Not only do all of these meals taste great, the are also inexpensive!


Brunoise on Foodista

Sunday, August 23, 2009

Do I have to go back to school?

Every August it seems like summer will last forever. The long days and warm weather make our back deck perfect for dining, or just sitting and reading a book or chatting over a glass of wine. Then suddenly it seems everyone kicks into a frantic gear to get the kids back to school which markedly changes the character or our neighborhood. Instead of leisurely walks with our dogs along quiet streets on weekday mornings, we either rise at 6 AM or share the narrow roads with speeding cars driven by parents dropping off their children at the high school in our neighborhood. Summer is coming to an end, which means it will soon be harvest season.

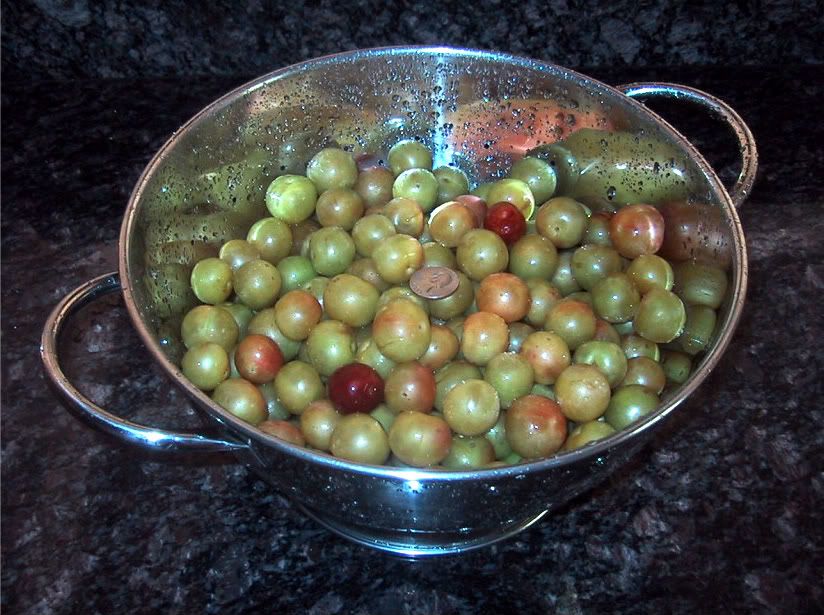
We should have been more prepared for the coming change when we saw table grapes appear at the Market stalls. There are all sorts of sweet red and yellow grapes available now that add color and texture to appetizers or make simple snacks. And they are good this year. My friends in the wine business are telling me that 2009 looks like a strong harvest of high quality fruit for California. The 2007 vintage was good with many white wines now available from that vintage. We have been enjoying many 2005 red wines lately, too. We tend to drink more white wine in the summer because our diet focuses more on light and raw dishes like cold vegetable-based soups and salads. Our entrees are usually fish, chicken, or legumes, which complement the acidity and light fruit in white wines. As the weather turns cooler we tend to eat darker greens like chard and kale and our entrees are built on a canvas of sauces which complement the bolder flavors of red wines.

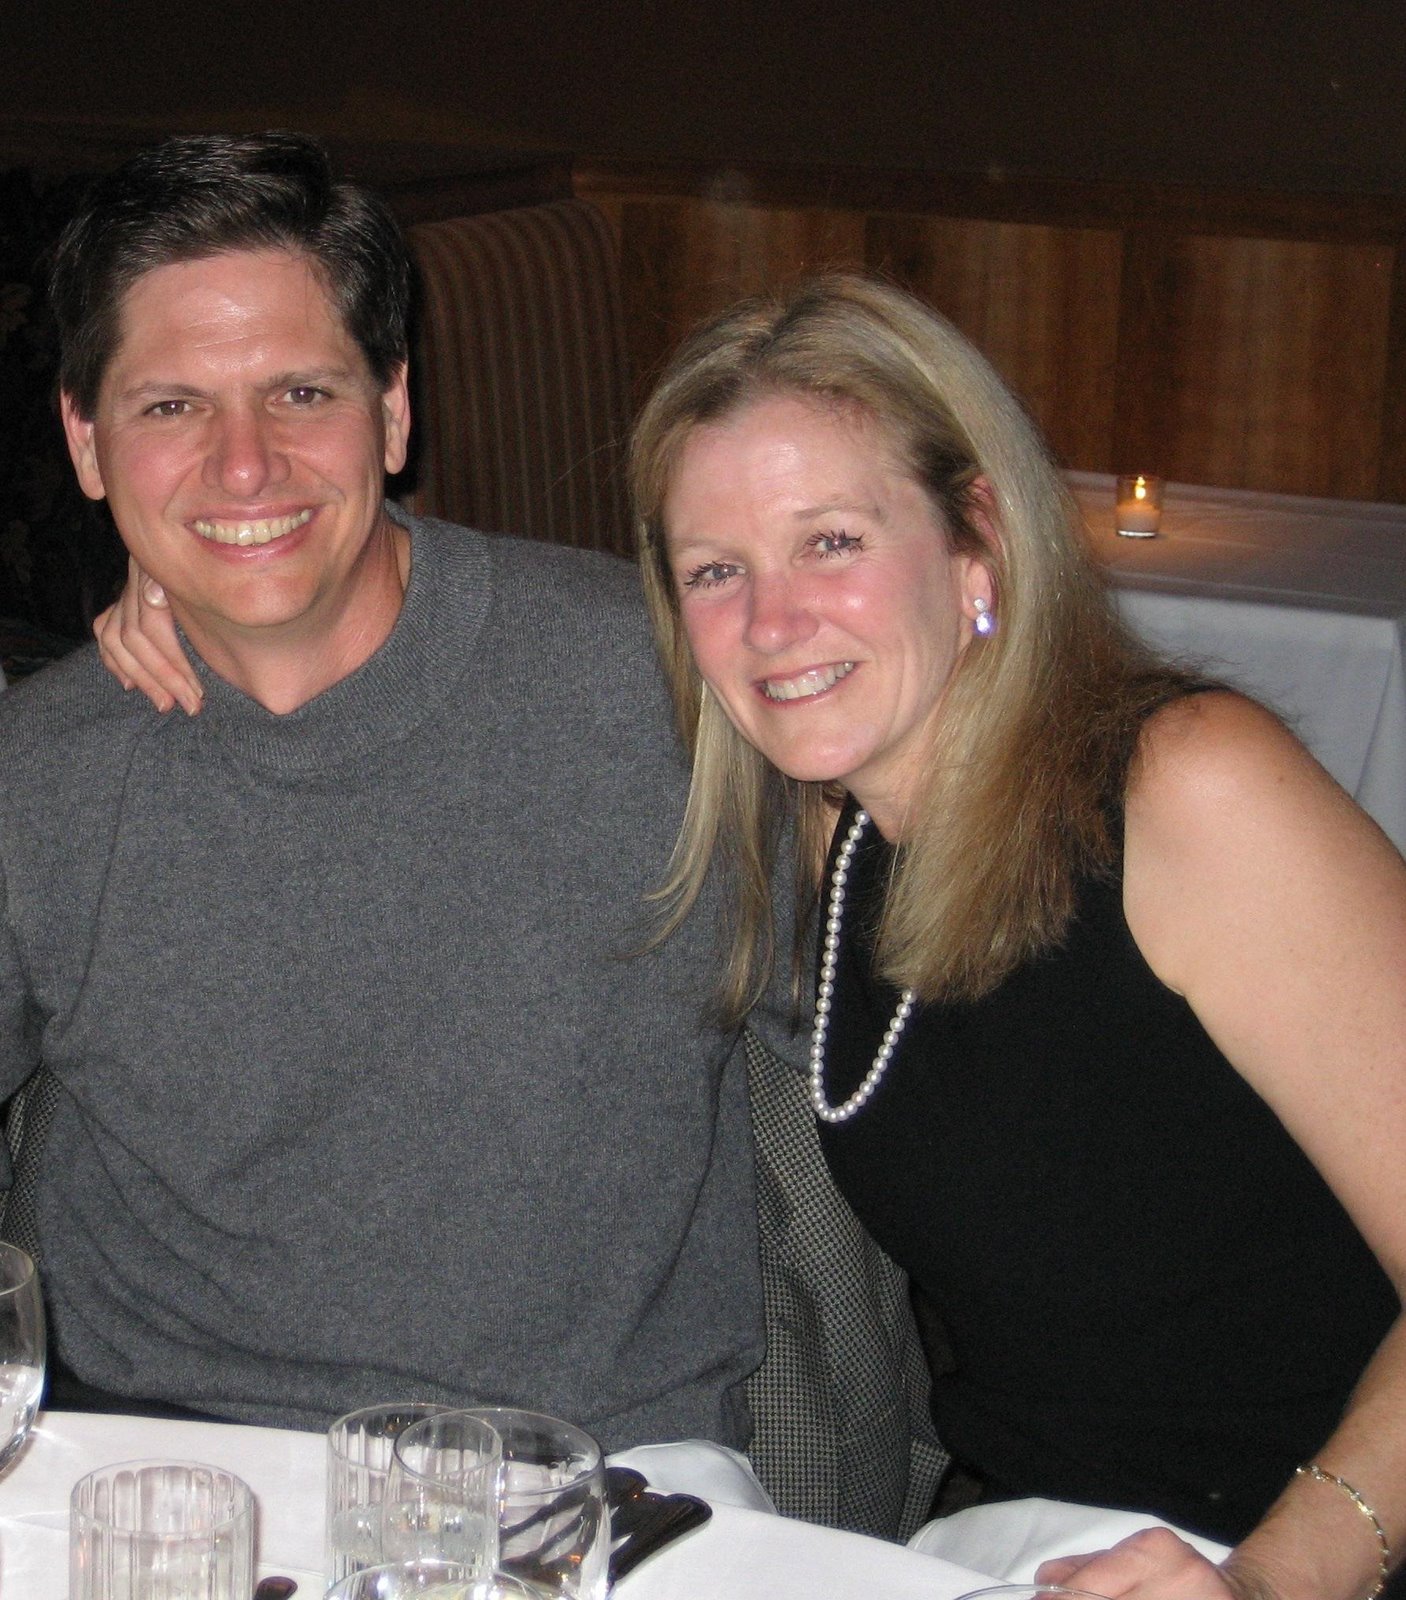
I am already thinking ahead to what we will be cooking and eating as the harvest peaks and wanes. We want to capture the best of the harvest to preserve for winter in our freezer or in canning jars. This Saturday Stacy and I held our class that was donated to benefit the Lick-Wilmerding High School. It was also the first time since March that I braised beef. I designed the menu to be fun and interesting for the folks that bid so generously to participate and to practice the September 12 menu that I will cook for 60 people that generously bid on seats to benefit the Howell mountain Elementary School. We became involved in both benefits through friends. Our friend Mark, who teaches physics at Lick-Wilmerding collaborated for the Saturday class donation; and our friends Jacalyn and Allen Spence of Spence Vineyards along with Summit Lake winery conceived the September 12 party, which I volunteered to cater. It seemed fitting to me that the menu for both events would be the same. The first in August to teach and practice at the scale of a 12-person garden party followed in September as a catering job with experienced cooks by my side to serve 60 in the vineyards at Summit Lake Winery.

The menu is typical of what I would serve to my friends at a dinner party since it offers the cook the opportunity to make almost everything ahead so the cook enjoys the meal at the table along with the guests. It is also useful for a larger scale party where there are limited kitchen resources. When I say limited, I mean cooking for 60 people at a location that has what I believe to be an antique 1940’s Autogas stove and oven. Suffice to say, it isn’t nearly large enough to cook for a dinner of that scale. My solution to this challenge is to serve all courses cold except the entrée which will be braised offsite and transported in coolers to the dinner. The menu is a juxtaposition of summer and winter reflective of the time of year.
Here’s the menu we cooked on Saturday.
I have posted the recipe files here.
(You must be a member of Cooking-Fresh to view the file)

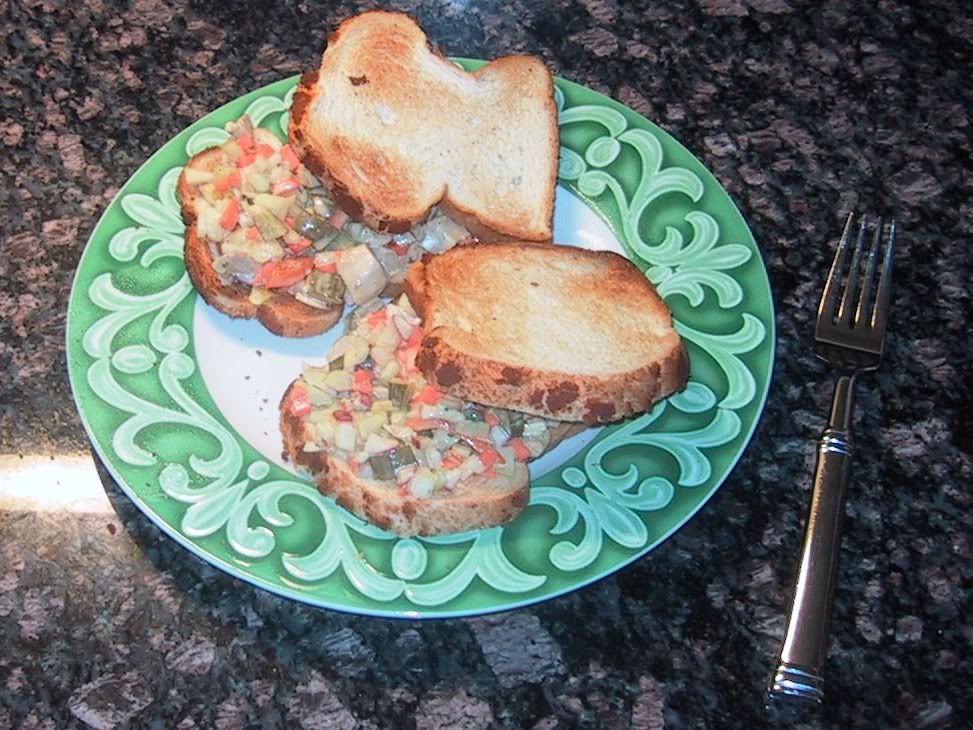
Appetizers: Heirloom Tomato Buschetta
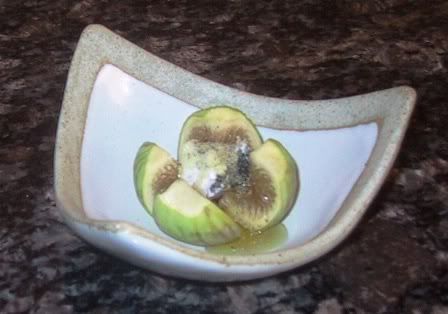
Fresh Figs with Peppered Honey and Chevre

Soup: Chilled Avocado Corn Soup with Cilantro Oil

Salad: Stone Fruit Salad with Asian vinaigrette

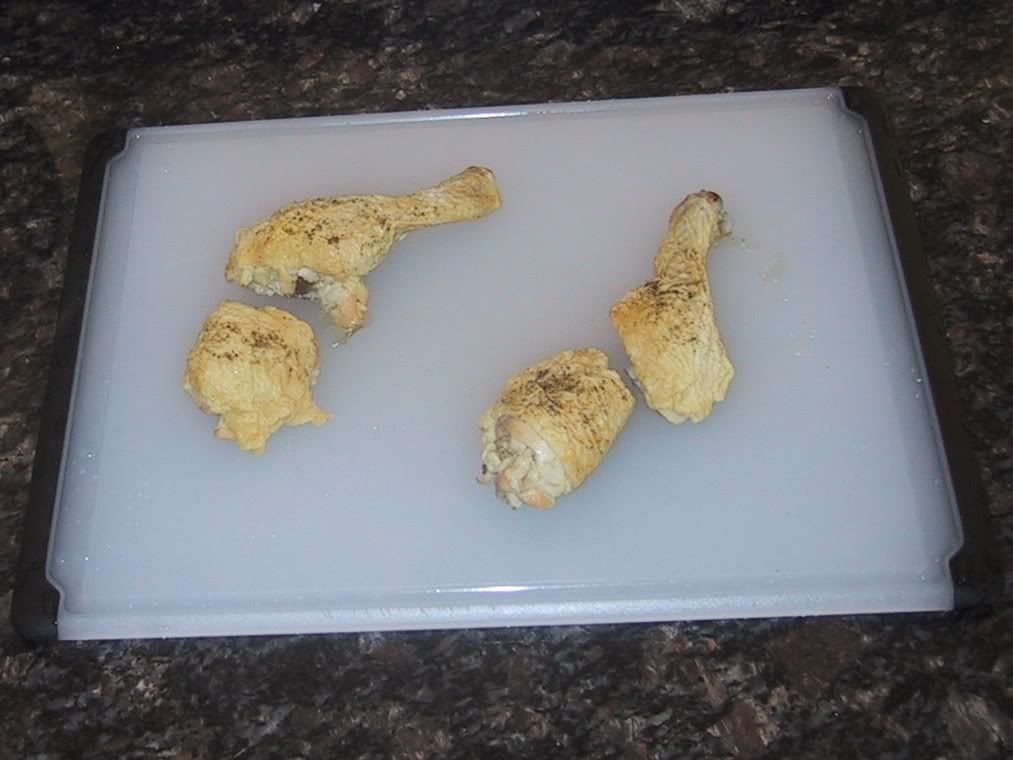
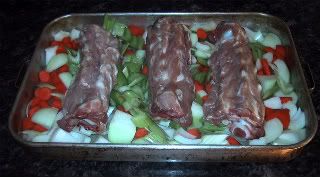
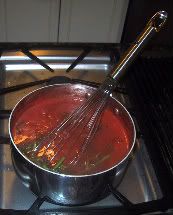
Entrée: Beef Short Ribs Braised in Howell Mountain Cabernet
Cabernet Sauce
Canellini Runner Beans Dressed with Garlic Infused Olive Oil

Dessert: Ghiradelli Award-Wining Chocolate Brownies
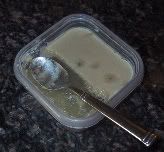
Home Made Raspberry Ice Cream
Raspberry Sauce

This five course meal may seem complicated and way too much work for one cook to prepare and serve, but it is easy with a bit of planning and cooking ahead to spread the work out so you aren’t slaving in the kitchen hours before the meal. Here’s how:

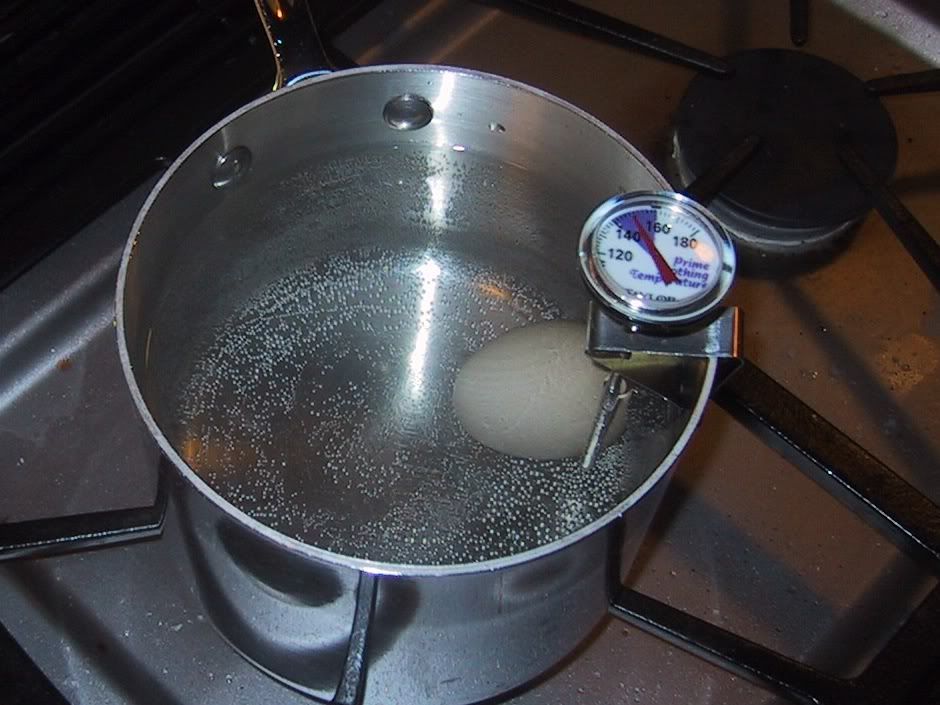
Weekend before: Make beef stock (for entrée) and make the corn soup base (up to the point that you add avocadoes). Store the stock in the fridger. Freeze the soup base. Start thaw two days before serving in the refrigerator

Two or three days before: Make ice cream and raspberry sauce. Keep the ice cream in the freezer and store sauce in refrigerator.

One or two days before: Braise the beef using your stock. Strain and finish the sauce. Recombine and store in refrigerator in the vessel you will use to reheat the dish.

One day before: Make garlic-infused olive oil for bruschetta. Make the vinaigrettes for the bruschetta and for the stone fruit salads. Make the peppered honey, seal in an air-tight container and store at room temperature. Shop for the remaining ingredients (if we’re serving on Saturday then we buy from the Farmer’s Market in the AM). Put the white wines into the fridge to chill and stand the reds up on their bottoms in your pantry or some other dark, room temp spot in your house (This makes the wine better when opened, trust me).

With all of the work you have done during the days leading up to the party, you greatly simplify what remains to do before your guests arrive, which are:

Stone Fruit Salad: Several hours before your guests arrive, slice the fruit and onion, add to vinaigrette and stage in refrigerator. Wash the greens and stage in refrigerator. When it’s time to serve the salad course, you simply toss greens with the vinaigrette, put some greens on each plate, top with fruit and onions and serve.

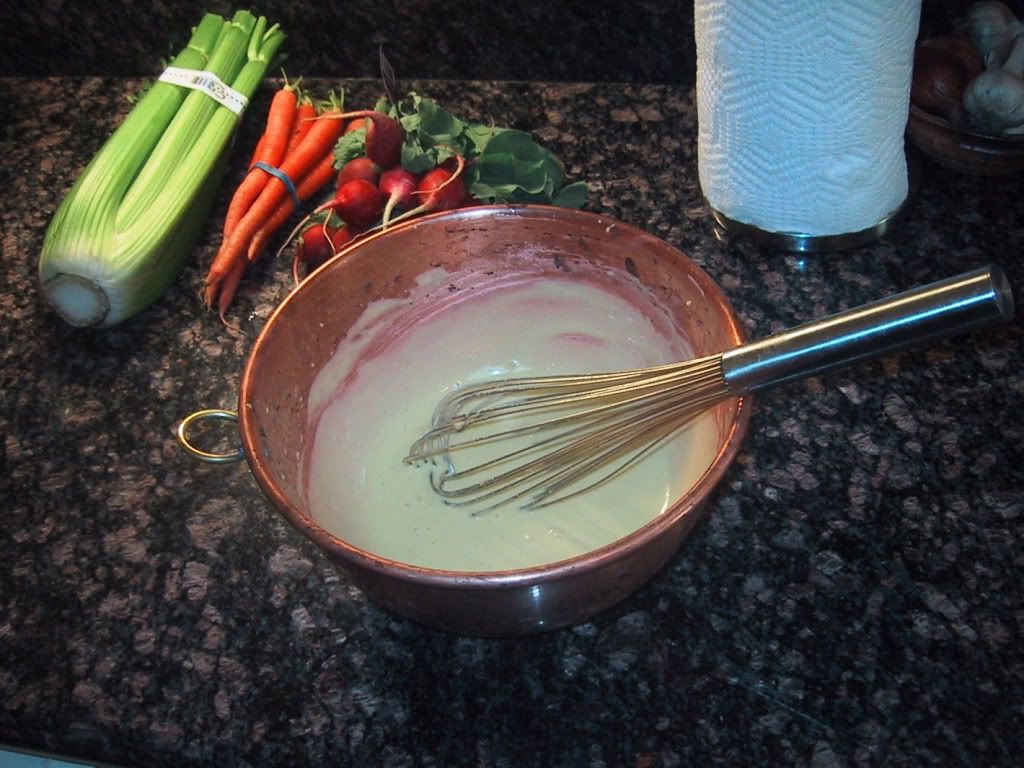
Soup: About an hour before guests arrive, blend the avocados and lime with the thawed soup base and refrigerate. Also blend the cilantro and oil and sieve. This takes about ½ hour of unattended time to let the oil come through the cheesecloth, so just let it do it’s thing on a counter in your kitchen. When ready, put into the refrigerator until service time. When it’s time to serve, place ½ cup of blended soup in each bowl, add the avocado balls and crème fraiche then drizzle with cilantro oil and serve.

Bruschetta: About an hour before the guests arrive, chop tomatoes and toss in vinaigrette and leave out on the counter; slice, brush with oil and toast bread ovals. Assemble bruschetta as your guests arrive.

Figs: One hour before guests arrive slice the figs and add the cheese. Store at room temp to allow the cheese to ripen. Drizzle with honey moments before your guests arrive.

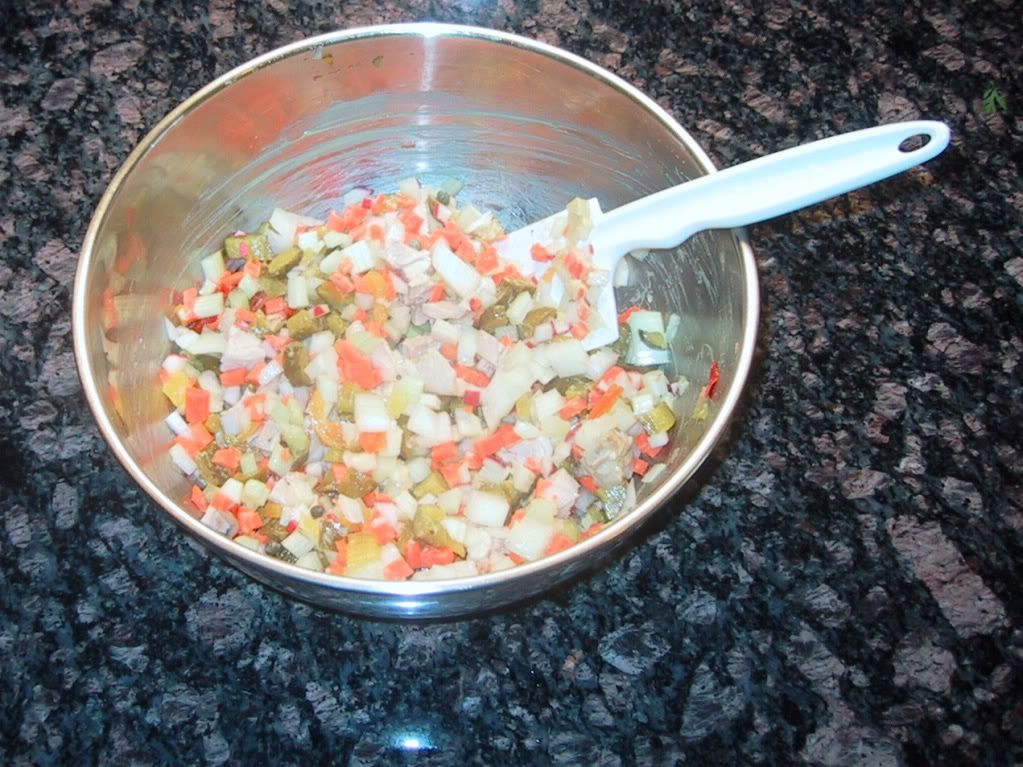
Entrée: A few hours before guests arrive, place the meat and sauce into a low oven, say 250 degrees. Just leave it in there until ready to serve. Also, shuck and wash the beans. Cut the onions and store both in the fridge. Set the beans and onions on the stove to simmer when you are ready to sit down for the soup. Check the beans between courses. When they are done, turn off the heat and let them sit until you are ready serve. To serve the entrée, take the meat and sauce out of the oven. Pool a bit of the sauce on each plate; add a rib and a side of beans that you strain out of the cooking liquid with a slotted spoon to each plate. Dress the beans with a bit of oil and salt and serve the plates.
The entree was the most kitchen time during the meal since it is the star of the meal and served hot it deserved the attention. Now linger over your wine with your guests and serve dessert when you feel it is time to transition the party.

Dessert: Bake the brownies either the day of the party or the day before. If you have two ovens and time it right you can mix the brownie dough and get them into the oven just before your guests arrive so they are warm when served. Also, take the ice cream out of the freezer and move to the refrigerator at the start of appetizers. That way it will be softened for service. The dessert service is simply place a brownie on a plate along with a side of ice cream and drizzle the raspberry sauce however you like.

You have probably noticed that the most stressful time for the cook is right before guests arrive. Don’t worry if you are still in the kitchen at the time you expect guests. It is rare that all of your guests arrive on time. I always welcome any one early into the kitchen to help with the final prep of the meal. It helps break the ice and also relieves me of some of the hectic work in that last critical half hour before the party starts. Be prepared to accept offers of help or ask for help as your guests arrive as it will make the party more fun for you and your guests.

Finally, for those of you dropping your kids off at school in the morning, please keep mindful that the groggy couple you see walking their dogs is not awake and needs a brake.

Tuesday, August 18, 2009

Heirloom Tomato Bruschetta


The heirloom tomatoes are at their peak right now. They are plump, juicy and burst with flavor. We are eating all kinds of cherry, early girl, purple Cherokee, yellow boy, red and green zebra, and pineapple varieties. I have developed the best recipe for bruschetta which was served as an appetizer at our Lam Family cooking party on Saturday. Stacy commented that the bruschetta "disappeared like bubbles". Justine, Chrissy and Jennifer ate them almost as fast as they made them. I like the hint of garlic notes in the vinaigrette and in the oil brushed onto the bread. We used early girl, yellow boy, and red zebra tomatoes. The combination of tomatoes made the bruschetta beautiful and delicious.

Bruschetta
1 sweet baguette sliced into ovals
4 medium tomatoes chopped
2 cloves garlic minced
2/3 cup of olive oil
Basil chiffonade as garnish

Method
Heat garlic and oil to a sizzle and remove from heat (infuses the garlic into the oil)
Brush one side of bread slices with oil and toast
Reserve garlic oil to make vinaigrette

To serve, toss tomato chunks in vinaigrette
Top bread slices oil side up with tomato chunks using a slotted spoon
Garnish with basil and serve

Balsamic vinaigrette

Ingredients
3 tablespoons balsamic vinegar
2 tablespoons fresh lemon juice
1 teaspoon Dijon mustard
1 teaspoon kosher or sea salt
1/2 cup garlic infused olive oil (see above)

Method
Mix first four ingredients into a bowl
vigorously whisk oil in a stream to emulsify

Tuesday, August 11, 2009

Fresh figs with chevre and peppered honey


Fresh figs are in season now and they are delicious. I came across a wonderful appetizer recipe using fresh figs that I used as an amuse bouche for a multi-course meal on Saturday evening. It is elegant, delicious, easy to make and beautiful to look at.

Fresh figs with chevre and peppered honey

2 oz of floral honey ( I used blackberry)
Several grinds of black pepper from the mill

Mix honey and pepper together in a small bowl.

12 figs
2 oz chevre. (I used the Humbolt Fog which is made by Cypress Grove)

Wash and clip the points off the figs.
Slice the figs into quarters from where the point was to almost the bottom, leaving the bottom attached so that you can open the fig. Did you know that figs are actually flowers that have turned in on themselves? That's why the inside looks like a flower when opened up.

Place each fig on a platter as an appetizer or on individual small plates as an amuse bouche. Put a small piece of the chevre in the center of each fig. Like all cheese courses, let the dish rest for about an hour so that the cheese ripens. Then drizzle the peppered honey on top and serve.
Note: The honey goes on just before service since it will run out of the fig onto the plate if you put it on and then ripen the cheese.

Enjoy!

Friday, July 17, 2009

Veal Stock is Elegance

If you want to run with the big cooks you gotta learn to make veal stock as veal stock is the perfect canvas to illustrate a sauce onto. Veal stock is rich although by itself seems neutral. When it is the base of a sauce, though, it makes the flavors of the sauce pop.

I don't like stocks that are in boxes and cans at the grocery store for many reasons pertaining to healthy eating. I especially don't like them since they seem devoid of what makes stock magical in a sauce: GELATIN! To get the best flavor and texture in my stock, I make from scratch. I make gallons of chicken stock particularly in the summer when chicken appears as our entree frequently. Chicken stock is the most versatile stock for light soups and I love it in risotto and pasta. Veal stock, on the other hand, I make in small quantities since I buy the bones from my butcher specifically for stock making (for chicken stock I always have plenty of carcasses in my freezer because I buy whole chickens and de-bone them myself). The expense and scarcity of veal stock in my freezer means that we only use the stuff for special occasions.

This Saturday I am cooking for three other couples and us as our turn in the HDASA annual rotation. HDASA, "Hammered, Drunk, and Stupid Again", is our wine and food group. The odd name was chosen to make the point that we don't take ourselves too seriously. I think it was captured in a round table brainstorming when we all had drunk quite alot of really good cab which made the name reflect the condition we were in at the time. But I digress. I care a great deal about these folks, so I put my heart and soul into the meal whenever it rotates to our house. As part of the prep, I made a pot of veal stock that I will use in a sauce for the lamb shank with Cabernet sauce entree.

This stock started with three veal necks from the local butcher. Necks and other knuckles make excellent stocks because of all the connective tissue in the joints. The total weight of the three necks was about five pounds which is a good amount for my 8-quart stock pot (I make chicken stock in a 16-quart model).

Veal Stock
5 lbs veal necks or other joints
3 yellow onions cut into chunks
4 medium carrots cut oblique
6 outside celery stalks cut on a bias
2 leeks washed. Pale parts sliced length-wise. Some of the dark green leaves reserved for the bouquet de garni
1 bunch parsley

Bouquet de Garni
A selection of herbs and spices tied into a leek leaf bundle.
For this stock I chose two bay leaves, rainbow peppercorns, fresh rosemary, fresh thyme, fresh oregano, and fresh marjoram.

Method
I like to roast the bones for a richer, more complex stock.
Pre-heat oven to 375 degrees F
Spread vegetables in a roasting pan and set the veal on top of the vegetables.
Roast until the meat is golden (lighter color makes a lighter stock, darker makes a darker stock)

Place roasted meat in stock pot and fill the pot 3/4 with water that covers the meat.
Bring the stock to a slow boil and skim the scummy foam from the top.
Add the roasted vegetables and bouquet. Return to a slow boil, skim, and lower heat to a tremble. A tremble is barely a simmer. You see the occasional bubble at the surface of the stock. This allows the stock to develop without turning the vegetables to mush.
After three hours add the parsley and cook one hour more. Add water if it gets too low. As the bones break down they make room for reduction. When I finish I have about 1/2 to 2/3 of a pot loaded before straining.

It is important to cool a stock quickly to avoid souring the stock. I fill my sink 1/2 with cold water and place the stock pot into the water. I let the water continue to fill the sink until the pot is about to float or the sink overflow, whichever comes first. Stir the stock and the sink water simultaneously to speed heat transfer.

Once cool enough to hold your finger in the stock, start the straining process. I start by using a slotted spoon to scoop out bones and vegetables from the stock pot to a coarse strainer set over a mixing bowl or other pot. Press hard on solids. When the solids are removed from the stock I strain the stock through a fine-mesh china cap into the bowl, followed by a second strain back to the stock pot. I then put the strained stock into containers that will be set in the refrigerator overnight to "freeze" the fat. It is important to de-fat any stock and this is the most efficient way. The next day you skim the frozen fat off the stock. I use the fat for frying eggs.

If you did a good job on the stock, the cold stock will be set like Jello, which is a protein-rich, low-fat goldmine. If you want demi-glace reduce the stock by 3/4.

Now, to make the peach ice cream dessert!

Tuesday, July 14, 2009

Urban Foraging


As Stacy and I walk through our neighborhood every morning with our dogs, we see the changing seasons which includes the ripening and all too often wasting of fruits from ornamental fruit trees. Stone fruit trees are beautiful in the spring when they show their tiny, blushing blooms. As spring turns to summer, the fruits grow into flame-colored spheres hanging beneath the green leaves. One particular house along our walk has two plum trees that grow between their back fence and a street. They don't prune or water the trees, yet the trees faithfully produce an abundance of small, intensely sweet plums year in and year out. One is a green plum and the other a small red. Both are of the Hardy Plum variety which are more well suited to Northern climes, which also do very well with little or no water, and thus appear as drought tolerant trees in home landscapes.

In mid summer as the fruit ripens and falls to the ground, it saddens me that the homeowners don't show more respect to their faithful trees by eating and preserving the fruit. Instead it falls to the ground to turn into mush which feeds the rodents, opossums, and raccoons that sulk around our neighborhood at night. Or it rots, which attracts green-bottle flies, biting flies, ants, and other annoying insects.


This year, I decided to harvest as much of the fruit as I could reach when it ripened. In about fifteen minutes I had acquired one and one-half gallons of the tasty fruits and only a few puncture wounds and scrapes from the nasty thorns hiding on the thicker branches. The project made me appreciate why our ancestors devised ways to preserve fruits as almost the entire crop ripened within one week. We are hosting a meetup August 2 when we will be preserving fruits using the hot-water bath processing method, in which we will process jars of jam. These plums will make a star appearance at the event and later this year when I am enjoying some on a piece of toast I will remember the warm July day that I picked the fruits.

Monday, July 13, 2009

The epitome of summer: Chilled Watermelon Mint Soup

This refreshing soup is the epitome of a warm summer day. I first made this dish as part of a multi-course meal paired with champagne and was hooked. This is not an easy dish to make as the watermelon must be pureed and sieved. I recently purchased a power juicer that makes the job much, much easier. If you don't have a juicer, I have made it many times using a sieve, so I invite you to take the time as your guests will love it.

Here's the recipe


Another challenge with this dish is to balance the sweet, salt and chile flavors. I have over spiced, over salted and over sweetened this soup to learn how to dial in the flavors. The best technique is to pour a small amount of the soup into a separate bowl and experiment with the flavors. When you get the small portion to taste perfectly, then scale the measure to the entire pot. I also recommend that you chill the soup overnight to let the flavors blend and mellow the chile a bit.


I also made watermelon sorbet from the other half of the melon since a half a melon easily makes enough soup for eight servings.

Watermelon on Foodista

Serrano Pepper on Foodista

Monday, July 6, 2009

Avocado Corn Soup


When the weather warms up, I like to prepare dishes that are served cold for two reasons: One the dishes are refreshing; and two, I don't have to heat the kitchen to serve the dishes, although they often do require cooking which may be done ahead. Also, I like to serve dishes in the summer that pair well with crisp wines, which introduces a broader palette of spice flavors and citrus to my cooking. One of my favorite is this avocado corn soup that is served chilled. The flavors in this dish are bold yet perfectly balanced. It may be made a day ahead except for the cilantro infused olive oil that is made no more than three hours ahead. It's a nice vegetarian dish which can be made vegan if the sour cream is omitted.

It's fun to make too. The stock of the soup is made by boiling corn cobs, corn and onions together with a bit of salt as if the cobs are the bones in the stock. The soup is brought together in a blender and then chilled for serving. Avocado balls are added to the soup as the meat of the soup to give texture to the dish. It is delicious and beautiful to look at too.

Avocado Corn Soup

6 servings as a soup course

Soup Ingredients
1 fresh ear of corn shucked
1 garlic clove peeled and smashed
4 cups water
1 1/2 teaspoons salt
1 1/4 cup minced sweet onion (vidalias work great)
1 fresh Serrano chile stem and seeds removed then the chile is minced (add the seeds back if you want more heat)
2 firm-ripe avocados
Juice of one lime
Sour cream (about 1/4 cup)

Cilantro infused olive oil ingredients
1 bunch cilantro torn from stems
1/4 cup extra-virgin olive oil
1/2 teaspoon salt

To make the soup, grill the corn until the kernels are lightly caramelized. Cut corn from cobs, and cut cobs into thirds. In a saute pan add water, corn cob pieces, corn, 1/2 cup onion, garlic and salt and bring to a boil. Reduce by half, remove and discard cobs, and transfer the rest to a blender and add in the chile. Blend until smooth. Add the flesh of 1-1/2 avocados to blender and blend until smooth again. Adjust seasonings and cool.

Prepare cilantro oil: Place all ingredients in a blender and blend until the cilantro is pulverized. Strain through a fine sieve into a bowl without pressing on solids. The oil should be bright green.

To serve, place soup in a bowl and cut balls of avocado with a melon baller and add to soup as the meat. Drizzle with sour cream and cilantro oil and enjoy.

Tuesday, June 23, 2009

Menu Planning

Stacy and I support the Taste of Howell Mountain auction every year which is a wine tasting and auction that benefits the Howell Mountain Elementary School. The only public school on the mountain. Our good friends Jacalyn and Allen Spence have been building a boutique winery around their home off White Cottage Road in Angwin up there. She is the President of the Howell Mountain Vintner's and Grower's Association that produces the auction each year. This year Spence Family Vineyards has teamed up with Summit Lake Vineyards to host a dinner and movie party for fifty at Summit Lake on September 12 as one of the auction items. Since I have been unemployed for several months now, Stacy and I decided we wouldn't bid at the auction, so I volunteered to cook the meal for the September 12 party. The party is oversubscribed for 52 diners at $100 per person, which is a huge success. Of course when you add in the staff to support the event, I have to plan and execute a meal for at least 60 people at a location that has limited kitchen facilities.

The first step to planning a dinner party is to align all stakeholders on the vision for what a successful event is. The criteria we agreed on are:
Elegant outdoor dining experience for the guests that will be served in the vineyard
Pair the entree with Howell Mountain Cab

My constraints include :
Cook off site and transport to the dinner
Make the meal profitable for the charity
Use volunteers as kitchen and service staff
Limited kitchen facility at the dining location

Once we agreed on the vision for the meal and understand the constraints, then comes the menu planning. With that many people there will likely be some folks that subscribe to a vegetarian diet, so the menu will be all vegetarian except the entree which will have both a meat and vegetarian option. Elegance means multiple courses served on individual plates delivered to the diners at the table versus a buffet style meal. I decided to execute a five course dinner with four courses served cold and the entree served hot. Here's the menu:
Appetizers
Heirloom Tomato Bruschetta
Hardy Lodge Cheese Straws
Soup
Salad
Heirloom Tomato Salad Napoleon with Bufula Mozzarella and Basil
Entree
Atop Tuscan Runner Bean Puree
or
Tuscan White Beans in Howell Mountain Cabernet Sauce with Germolata (vegetarian)
Gorgonzola Polenta
Dessert
Flour-less Chocolate Cake with Homemade Raspberry Ice Cream
Sounds good, huh? Note that only one course is served hot which is braised. This entire meal can be made days ahead with minimal cooking for service. Also, note how the appetizer links to the salad course. The salad is made by slicing tomatoes of different colors; staking four slices per serving then cutting the stacks into perfect squares. This creates a beautiful presentation while removing the skins from the salad. The trim is then chopped into small chunks for the bruschetta so that nothing is wasted. The dressing for the salad is the same as the bruschetta. To make the meal more interesting, the bruschetta will be served on a baguette slice that is brushed with garlic-infused olive oil. That way the two dishes become distinctly different despite being made from common ingredients. Also, since the soup course separates the appetizers from the salad course, the diners will feel that the meal is diverse and varied. And also beautiful and delicious. Also, there are two appetizers that are completely different to add depth and complexity to the tastes the diners will experience. All while making it easier for the cook to execute the meal. The cheese straws will be baked that morning and served room temperature.
The soup is served cold, so it is easily transported. However, the dish does present challenges: While the stock of the soup is a combination of white onions and corn husks, which can be made days ahead and chilled, avocado easily spoils, which is the meat in the soup. The soup will be made one day ahead and transported in coolers then the avocado balls added on-site so that the avocados are transported in their shells and processed right before serving to ensure freshness. Another challenge in the soup is the cilantro oil since the herb carries bacteria that are harmless until they see an environment with no oxygen, like being suspended in olive oil, so the cilantro oil must be made about an hour before service. The ingredients will be blended on-site to execute that ingredient and avoid making any diners ill. The tomatoes are also a challenge to keep them fresh, so they will be cut on-site and the slices refrigerated until time to serve the salad. The entree will be made days ahead, which makes a better product since the flavors marry in the dish. It will have to be re-heated on-site, so we need oven space for 60 lamb shanks. That will be a challenge. The ice cream will be made ahead and brought frozen. Cakes can be made ahead too, so that won't be hard.
I will describe the process for planning the execution of the meal in an upcoming blog. Stay tuned!