Friday, June 19, 2009

Pluot Jam

Sometimes we buy more pluots and plums than we can eat at the farmer's market. We also grow Santa Rosa Plums in our yard and a guy that works with Stacy brings Santa Rosa plums to the office to give away. The season is so short every year that we want to gobble up as much of the delicious fruits as possible, but we can only eat so much. So I use the extra to make jam.

Jam is so easy and you don't need any expensive equipment. Since I put jam into 8 oz jars, I use my stock pot as the canning processor. I buy the jars at the local supermarket. I like the Kerr Quilted Crystal Jelly Jars.
The recipe is simple and works with all kinds of fruits and berries.
For every cup of cooked fruit add 1 cup of sugar and a squeeze of lemon. I peel the fruit by scoring an x on the bottom of each pluot; boiling for 30 seconds to a minute until the skins start to curl a bit; then into an ice water bath to cool. Then I peel the fruit over the sauce pan I will cook the fruit in so I don't lose any juice. Then on the stove to simmer with the lemon juice for about 20 minutes to 30 minutes to cook the fruit to mush. I leave the pits in during this part.

To test if the fruit is ready to be jellied, freeze a plate in your freezer. Put a spoon of the fruit on the frozen plate. Let it cool for a minute and then drag your finger through the dollop. If the fruit runs back together, continue cooking and test again in five minutes. If the valley stays in the fruit, then you're ready to can. I use a jar lifter, canning funnel, lid caddy (to sterilize the lids) and a magnetic lid lifter. These gadgets are cheap and make the whole job so much easier.

Remove the pits from the cooked fruit. My food mill works great for this. A colander also works. While the fruit finishes cooking with the sugar I have the jars in boiling water in my stock pot to sterilize. When ready to can, I lift and empty the jars and put on a towel where I will fill them. I then remove the same amount of water from the stock pot that will be fruit in the jars when I process the jars. That's important to avoid a big mess on your stove when you place the filled jars into the pot. Once the jars are out of the water, in go the lids to sterilize and soften the seal a bit. Careful not to leave these in more than five minutes. Meanwhile, fill the jars leaving some head room in the jars and set the lid with a ring just snug. Don't over tighten. It's okay if the last jar isn't completely filled. It will be the first one eaten! Process the jars for 10 minutes. Remove and let stand for a few hours. You can tell if the jars are sealed if the lid doesn't move when you press on it. If you're in the kitchen as the jars seal they make a clicking sound which is reassuring that you are getting good seals.

A note about pectin. Many recipes call for pectin which you can buy at the grocery store usually in the baking section. Pectin occurs naturally in fruits. Less ripe fruits have more and riper fruits have less. If the jam doesn't pass the jelly test, you may can it anyway without adding the manufactured pectin. Then rename your jars pluot spread instead of jam. It tastes divine and goes great on pancakes and toast. If you want a jam that stands at attention on the toast, then add pactin according to package instructions.

Wednesday, June 17, 2009

New kitchen gadget

With cherry season at its peak right now, I need to find ways to process more of the fruits quickly! Last Saturday at our Summer Fruit meetup, we made a cherry sorbet that was incredible. We used the dark bing cherries that we pitted using my new cherry pit remover gadget, juiced in my Breville Elite juicer, then mixed with a bit of simple syrup I had made ahead that was perfumed with Meyer lemon, and then we froze the sorbet in my Cuisinart ice cream maker. The recipe is a basic sorbet recipe that I use with many different fruits. I use the juice of the fruit I have on-hand in the same proportion each time. Stacy calls it the essence of the fruit. For the cherry sorbet I used kirsch brandy as the spirit, which makes the cherry flavor "pop", while preventing the sorbet from freezing too hard.

The cherry pit remover gadget is a simple tool that makes pitting cherries a snap (olives too, I have been told). It is the Oxo Good Grips cherry pit remover. I bought mine at Sur La Table in San Jose. Here it is on-line for $13. There is one trick to perfect pitting: align the vertical seam of the cherry to the inside toward the handle and make sure the plunger is perfectly aligned where the stem was removed. After a few cherries, I got the hang of it and pitted a whole pound in less than two minutes. Worth every penny!


Tuesday, June 16, 2009

Canning Day

I love pickles of all kinds. My favorites are always home canned because the flavors and colors are so much brighter. It is satisfying to open a can of homemade pickles, too, because you know where everything in the jar came from.

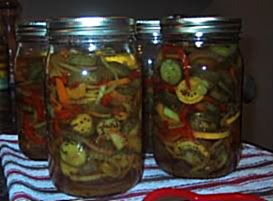
I spent a few hours canning some bread and butter pickles, garlicky dills, and some strawberry jam on Monday. I processed all three together since my water bath requires so much energy from my stove to bring to a boil. Also when canning I get into a rhythm so it is less work to do more in the same session versus canning small quantities each time over a series of days.

The strawberry jam was made from some left-over berries we bought fresh on Saturday. Most of the berries were used in a dessert later that same day. Since the berries don't have sulfates on them they don't keep more than two days. Canning some jam is a good way to preserve the wonderful fruits for later use. The cucumbers, peppers, onions and dill were purchased specifically for making pickles. Next year I hope to have my garden in so that the fruits and vegetables will come directly from our own land.

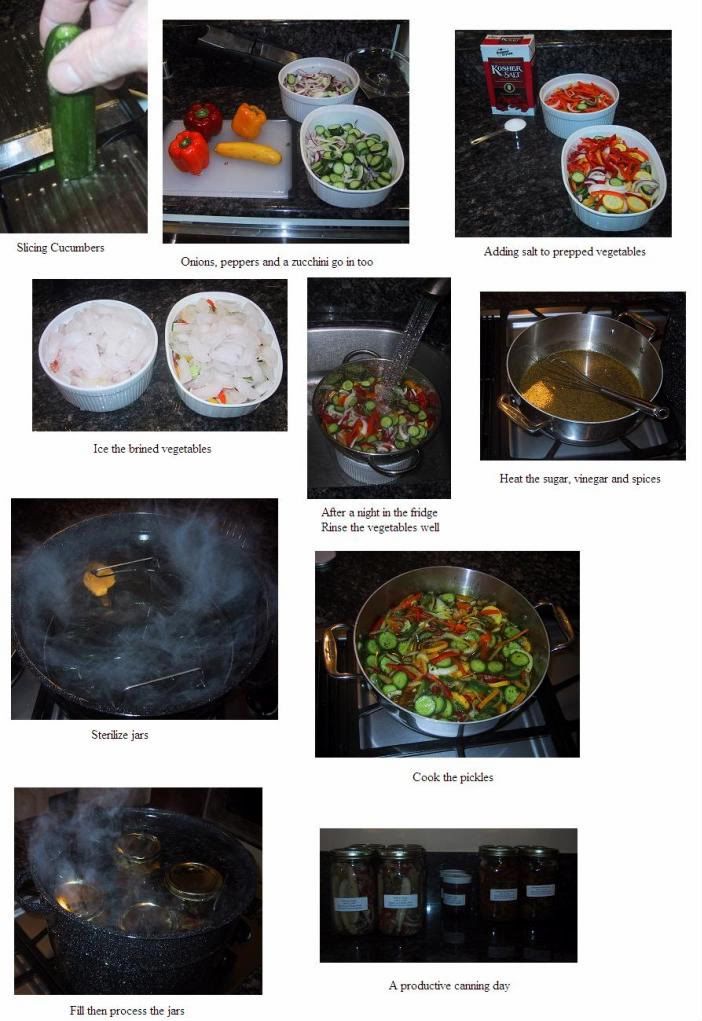
Here's the recipe for the bread and butter pickles that are nice snacking pickles. I also use them in mayonnaise-based salads like chicken salad for sandwiches. The juice is also nice in deviled eggs:

Crisp Bread and Butter Pickles

8 medium onions
2 large sweet red, yellow or orange peppers (green can be too herbaceous)
1/2 cup coarse Kosher salt
1 gallon unpeeled cucumbers sliced 1/4 inch
2 1/2 cups sugar
2 1/2 cups white vinegar
1 tablespoon mustard seed
1/2 teaspoon s each, ground turmeric and whole cloves

Slice onions thin. Cut pepper into thin strips. Dissolve salt in 1 cup water and pour over sliced vegetables, including cucumbers. Put some ice on top of cucumbers (use about 1 quart ice: it is the ice and salt that gives an almost brittle, crisp pickle). Let stand three to six hours, weighted with a plate: drain. Combine remaining ingredients and bring to boil. Add drained vegetables and heat to boiling point (don't boil). Pack in hot sterilized jars, filling to 1/2" from top; add lids, loosely tighten rings and process the jars in a water bath for 15 minutes.

Make sure jars are sealed. Any that did not seal, refrigerate.

Makes 6 pints.

Monday, June 15, 2009

Old Fashioned Blueberry Pancakes

Pancakes are one of the best comfort foods. This week we bought extra blueberries since they are at the peak of their very short season and we couldn't resist. We also had more milk in the fridge than usual, so I decided to use both to make some old fashioned blueberry pancakes. This is as basic as a pancake recipe gets. No meringue or cultured buttermilk, and no box either. These are from scratch and easy to make. Stacy commented that they reminded her of eating a blueberry muffin, which I took as a very positive endorsement. You can omit the fruit or replace it with other fruits like strawberries, sliced stone fruits, even sauteed apples. We enjoyed these for breakfast on Sunday, which was the perfect way to start our goof-off day.

Here's the recipe:

Pancakes

Yield: Makes six generous pancakes
Ingredients
1 1/2 cups all-purpose flour
3 1/2 teaspoons baking powder
1 teaspoon salt
1 tablespoon white sugar
1 1/4 cups milk
1 egg
3 tablespoons butter, melted
1 Cup fresh blueberries, washed


Method
Together, sift the flour, baking powder, salt and sugar into a large bowl. Make a well in the center and pour in the milk, egg and melted butter; mix until just combined. Add blueberries and mix with just a few strokes to distribute through the batter.
Heat a lightly oiled griddle to 370 degrees (or over medium heat). Pour the batter onto the griddle, using approximately 1/2 cup for each pancake. When bubbles start to break, flip and brown on the other side. Serve hot.

Thursday, June 11, 2009

Simply elegant appetizer

Throwing a dinner or cocktail party can be stressful, particularly for the one that cooks all of the food. I am always looking for gourmet appetizers that are easy to make ahead of a party. My neighbor Kathy has been a caterer for many years with that seasoned wisdom that comes from "been there done that". She brought these to a dinner party at our house and Stacy fell in love with them. She recently gave me the recipe which I tried for the first time yesterday. These are incredibly easy to make! Essentially it is a cheese biscuit dough rolled out and cut into strips. These versatile munchies will be used as a garnish for a scallop on zucchini sauce dish we are making this Saturday in our Summer Fruit meetup.

Here's the recipe:

McHardy Lodge Cheese Straws
¾ Cup flour
1 teaspoon baking powder
2 oz cubed butter (make sure it is cold. I have seen cooks grate frozen butter for biscuits)
a shake of salt and a fresh grind of pepper
pinch of mixed herbs
pinch of chili powder
¾ cup grated sharp cheddar cheese
About 1 tablespoon milk

Method:
Pre-heat oven to 400
in food processor pulse all ingredients to mix - it will look like coarse corn meal
add ¾ cup grated sharp cheddar cheese and pulse again
add enough milk to combine so the dough comes together without being wet

Be sure not to overwork the dough after adding the milk. The less manipulation the lighter the biscuits will bake.
roll out on floured board
cut into straws or biscuits
bake at 400 degrees until browned about 10 minutes

Enjoy!

Tuesday, June 9, 2009

Hopi Blue Corn Bread

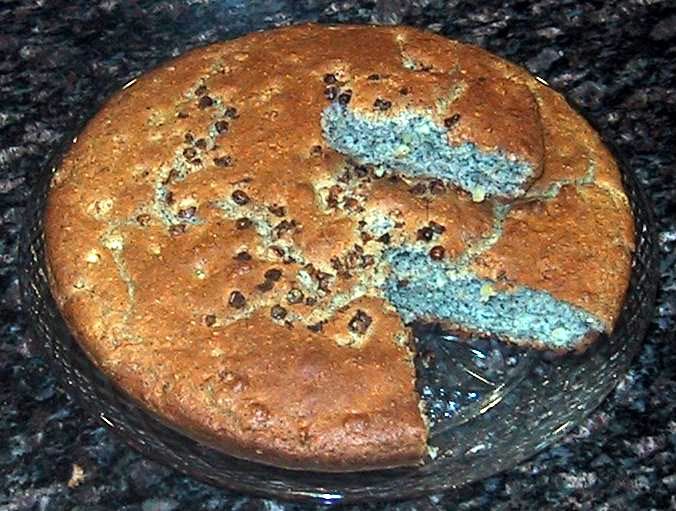
The cool weather of late in the Bay Area has me wanting comfort food so I baked a skillet of corn bread using Hopi-Blue corn meal from Tierra Vegetables, a Sonoma County grower of vegetables and sheep. They make a very small amount of milled corn meal, and an even smaller amount from blue corn. They offer their produce at the San Francisco Farmer's Market and also out of their roadside stand in Santa Rosa. If you can get the blue corn meal it creates a colorful bread that makes a simple peasant dish gourmet.

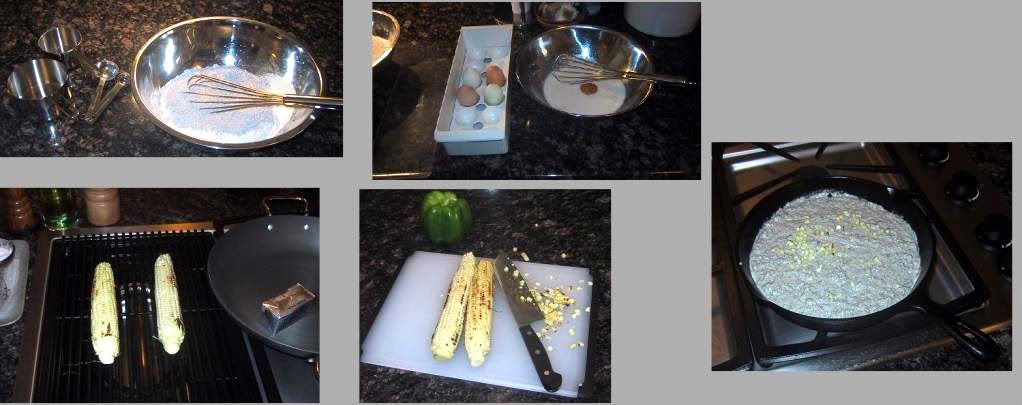
The recipe below can be used with any corn meal. I like the texture when the meal is fine ground for eating pieces of the bread alongside dishes like boiled beans. If I plan to use the corn bread in a stuffing, I use a polenta grind. Either way, this is a basic and versatile recipe. For this session I grilled some white corn and stripped the ears into the batter and also sprinkled some kernels on top. This adds a nice variety in the bread.

Corn Bread
1 cup all-purpose flour
1 tablespoon baking powder
1/2 teaspoon salt
1 cup cornmeal
1/4 cup sugar
1 cup milk
1 large egg
1 stick (1/2 cup) unsalted butter, softened

Preheat oven to 400° F. and pre-heat a 10" well-seasoned cast iron skillet. If you don't have a cast iron skillet, butter 1 9-by-5-by-3 inch loaf pan.
Into a large bowl sift together flour, baking powder, and salt and whisk in cornmeal and sugar until combined well. In a bowl whisk together milk and eggs until just combined. Add butter to flour mixture and work it in with your fingers until mixture resembles coarse meal. Beat in egg mixture until just combined.

If desired, grill two ears of corn until kernels are carmelized and softened. Strip kernels from ears and divide 2/3 of corn into the batter and 1/3 for sprinkling on top before placing the skillet or pan into the oven.
Pour batter into pan and bake in middle of oven until golden and a tester comes out clean, about 40 minutes for skillet or 50 minutes for pan. Cool corn bread in pan on a rack 10 minutes and turn out onto rack to cool completely. Corn bread may be wrapped in plastic wrap and kept in a cool, dry place 2 days or frozen 2 weeks.

Monday, June 8, 2009

Pickles


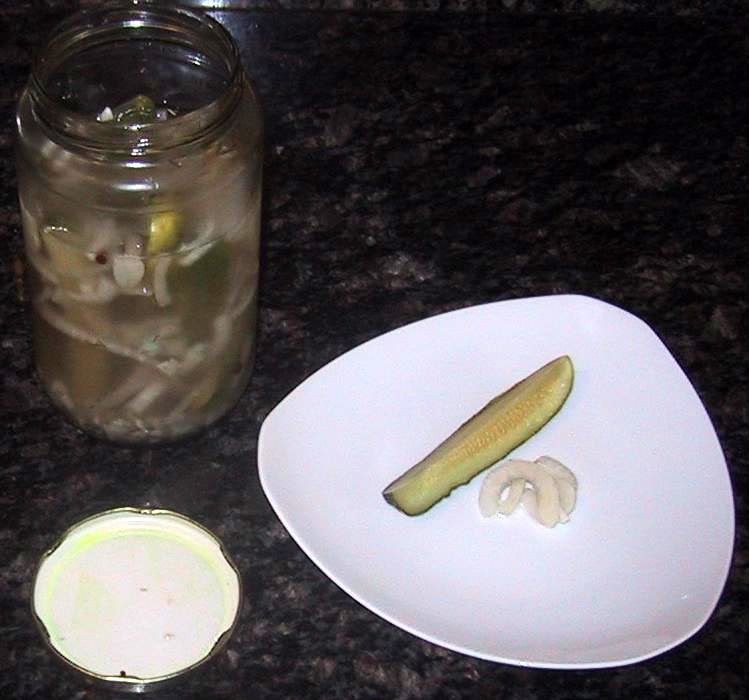
In the warm months we love our fresh fruits and vegetables. One of my favorites is the cucumber. I use them in a variety of salad dishes to bring that light and fresh taste to summer fare. As the season gets into full swing I also think about pickles to preserve the fruits for use in the colder months.

Some restaurants we frequent seem to pickle just about everything to accompany a gourmet sandwich. Case in point is Hog Island Oyster Bar in the Ferry Building in San Francisco and now also at the OxBow Market in Napa. They make a grilled cheese sandwich that is the best I have ever tasted, which always gets served with some pickle or other. The tart flavor of the pickle is a perfect complement to entrees that contain fat like cheese and meats.

The easiest pickling method is to use a vinegar and brine mixed with spices. This is also safer than the fermentation method, which I will cover in a future blog (great for deli style dills and sauerkraut). The vinegar and salt kill the bacteria in the pickle mixture and prevent lactoid fermentation.

Here's a recipe for dill pickles that you can use for pretty much anything you want to pickle. The great thing about this recipe is that it only takes three days before you are enjoying your pickles.

Vinegar Dills
Sterilize a 1 quart jar and lid with boiling water
Ingredients
6 or so pickling cucumbers (or zucchinis, carrots, radishes, etc, enough to tightly pack the jar)
1/2 red onion thinly sliced
2 garlic cloves peeled and sliced
1/2 teaspoon mustard seeds
1 handfull fresh dill
1 1/2 cups water
1/2 cup cider vinegar
2 tablespoons kosher salt

Method

Boil liquids to dissolve salt and cool.
Once cool, set pan with brine in an ice bath to bring temperature of liquid near freezing (this is what keeps the cucumbers crisp so they still have a crunch after pickling)
Wash and remove stems from cucumbers and then make spears by slicing into quarters lengthwise.
Stuff the jar with the cucumber spears, sliced onion and garlic. Make sure to pack tightly so the cucumbers don't float up after adding the brine.
Pour the brine over the pickles and seal the lid. Set the jar on your counter for three days turning occasionally. Then refrigerate. The pickles are ready to eat and can be stored in the fridge for a year.

Stacy and John Murphy host an instructional, nutritious, and fun hands-on cooking class one or two Saturdays each month using ingredients that come fresh from the San Francisco Farmer’s Market.